Pavanamuktasana (Wind-Removing Pose): How to Do It Step by Step

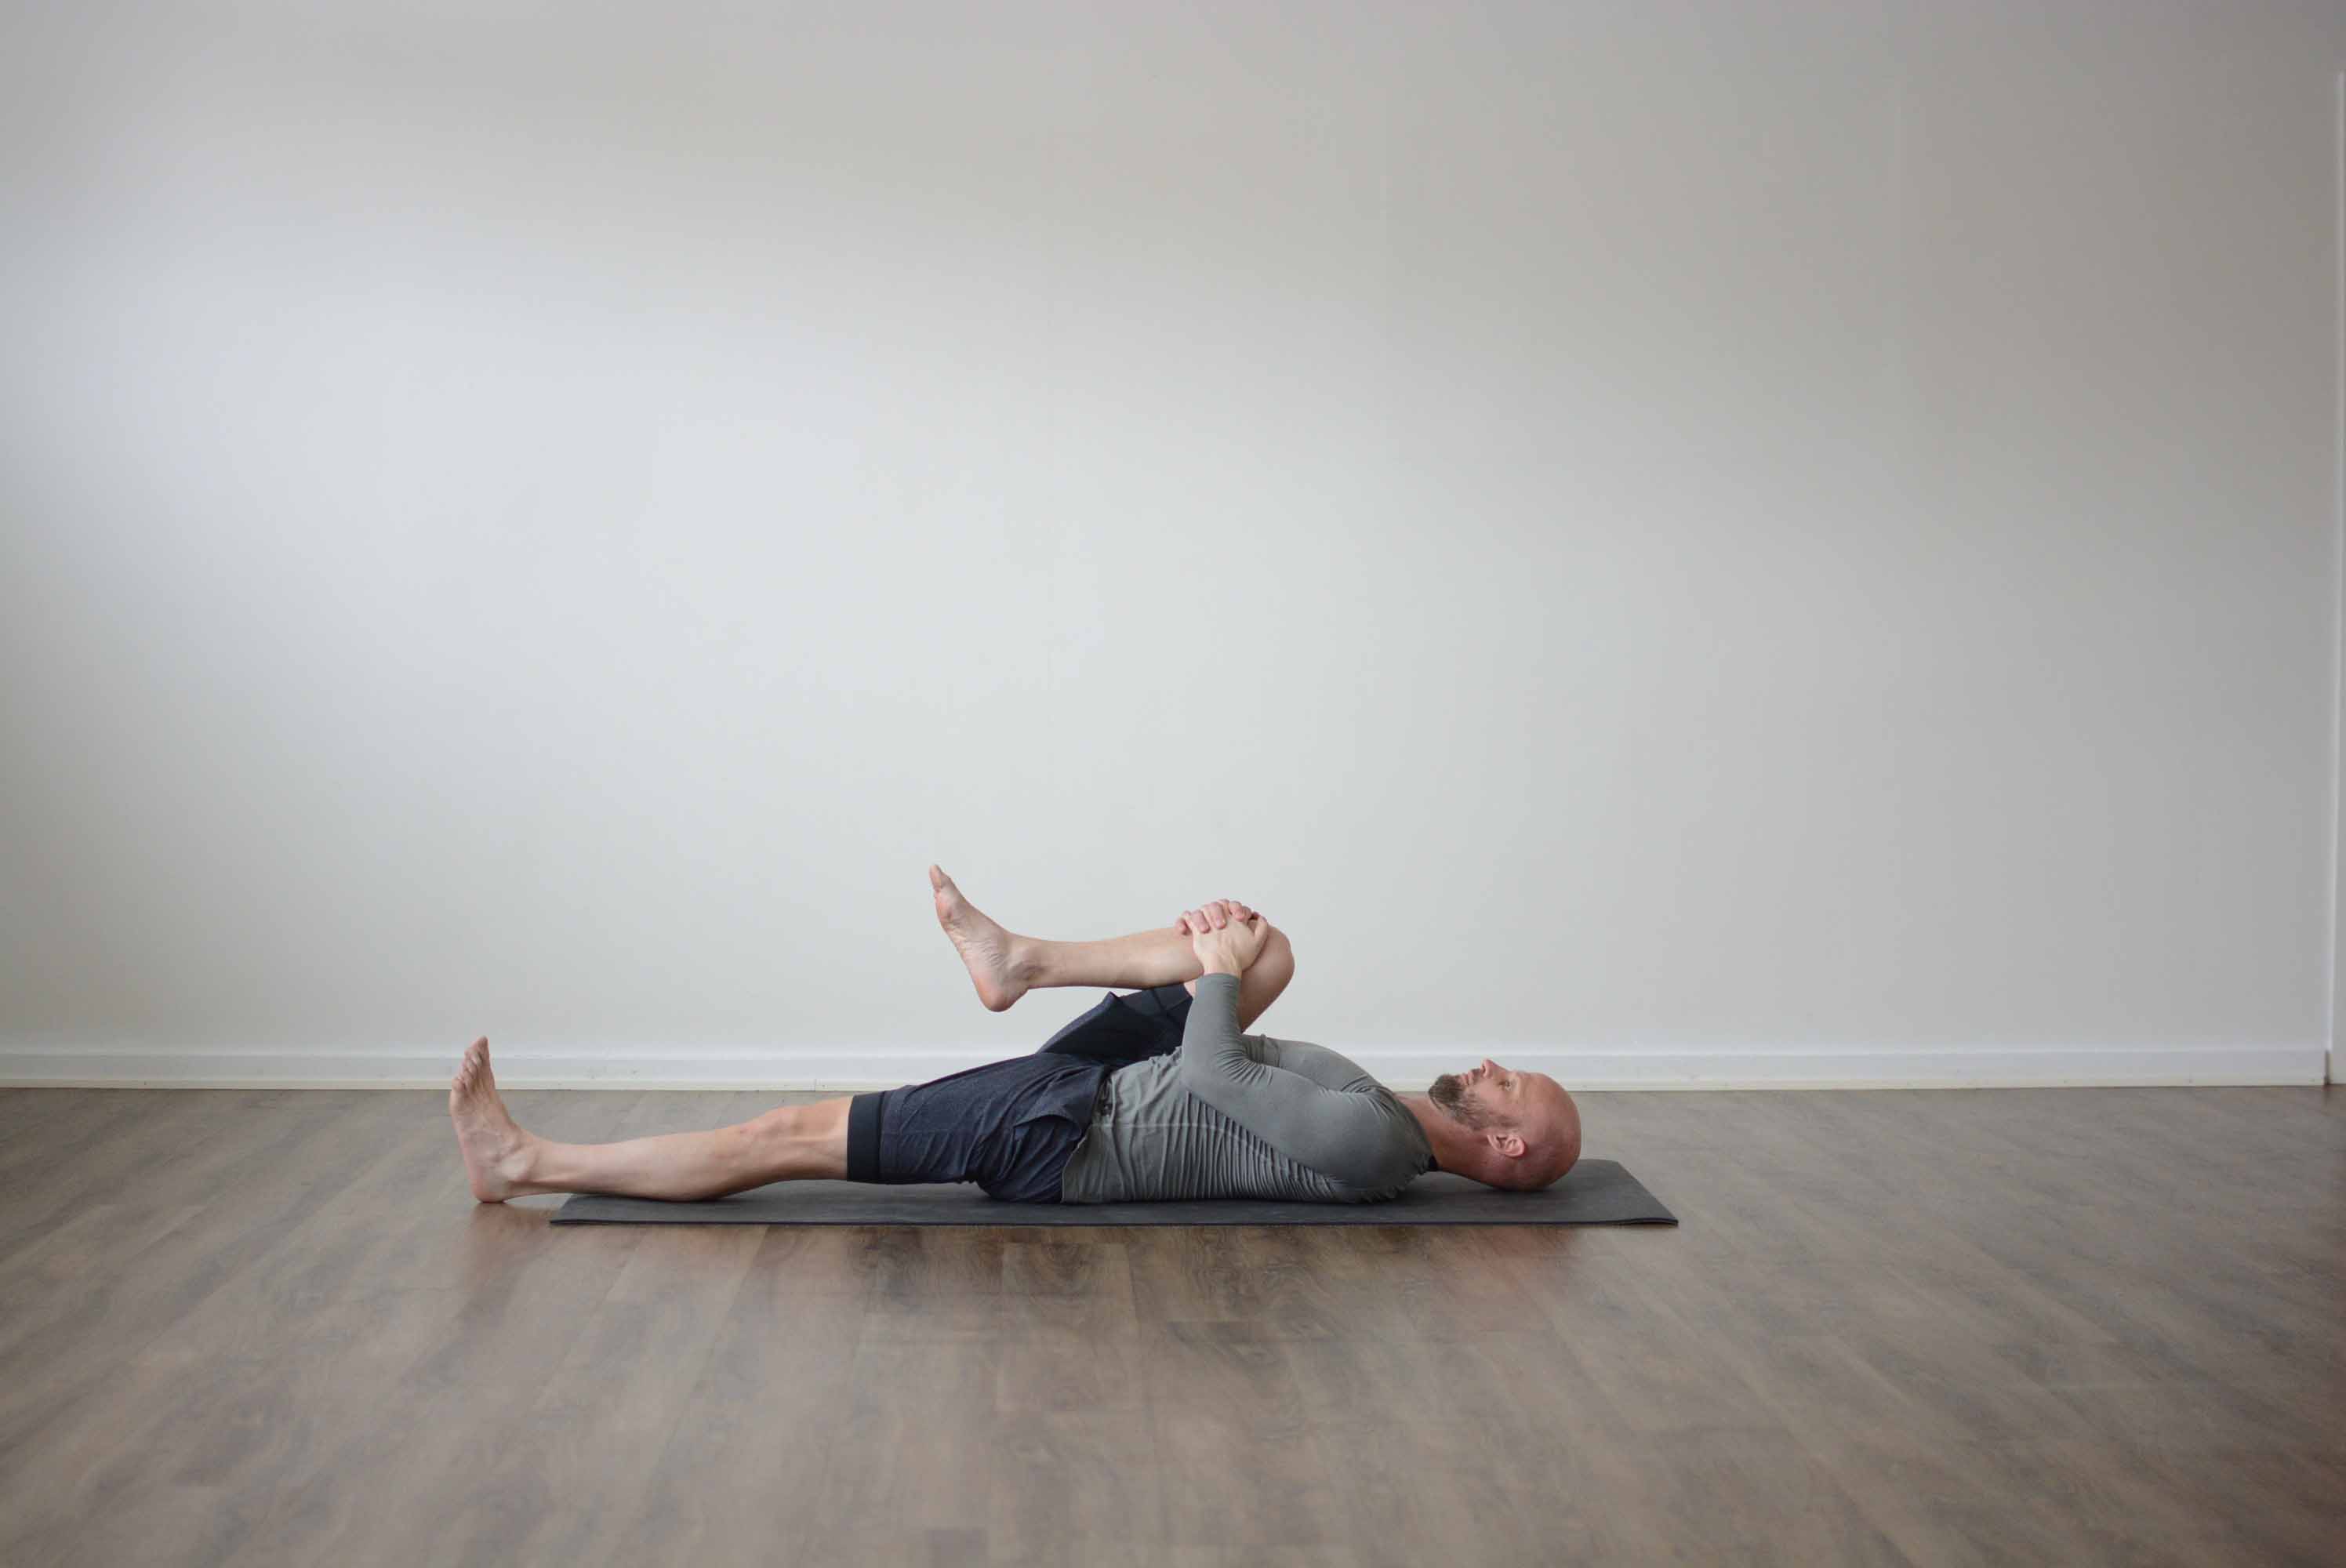
Pavanamuktasana (Wind-Removing Pose) is a yoga pose done lying on your back, where you hug one knee or both knees in toward your chest. It gently presses the thighs into the belly and rounds the lower back against the floor. The name refers to its best-known use: it can help you pass trapped gas.
Pose type: supine, gentle forward bend of the hips and lower back. Level: beginner. Props: none, a strap if your hands do not reach around the knee.
What Pavanamuktasana means
The name has three Sanskrit parts: pavana, wind or air, mukta, released or freed, and asana, posture. So it is the wind-releasing or wind-relieving pose. You will also see it spelled Pawanmuktasana, and the both-knees version is called Apanasana in many studios, after apana, the downward-moving breath or energy of the lower belly in yoga philosophy.
The pose is not in the old hatha texts. It became widely known in the 20th century, through the Bihar School of Yoga, where "Pawanmuktasana" is also the name of a whole series of easy joint and belly exercises, and through the Bikram or Hot 26 sequence, where it is the first pose of the floor series.
How to do Pavanamuktasana, step by step
- Lie on your back with your legs straight and your arms by your sides. Let the back of your head rest on the floor.
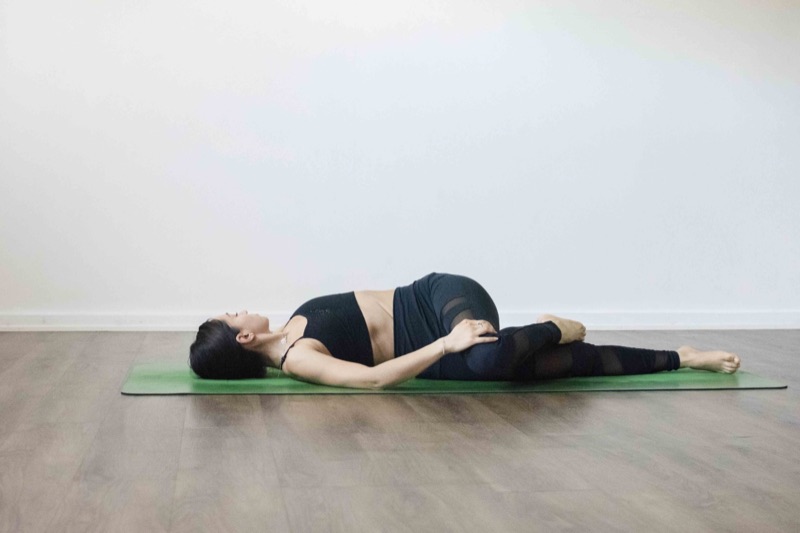
- Bend your right knee and draw it toward your chest. Interlace your fingers around the shin below the knee, or hold the back of the thigh if your knee does not like pressure on the shin.
- Pull the knee down toward the right side of your chest, close to the armpit, so it passes beside your belly. Keep your elbows close to your body and your shoulders down on the floor.
- Let the left leg rest long on the floor, heel down. Relax the hips, the lower back and the tailbone down toward the mat.
- Breathe slowly through the nose. On each exhale, let the belly soften and the knee come a little closer. Stay for 5-10 breaths, about 20-30 seconds.
- Release the right leg down, then repeat with the left knee.
- Now bring both knees in. Hold your elbows, or hold each shin, and hug both thighs toward your chest. Keep your head and shoulders down. Stay for 5-10 breaths.
- Release both legs to the floor and rest for a few breaths. Repeat the whole round once or twice.
In the Hot 26 sequence you hold each side for 20 seconds and do two sets, and the head stays down on the floor the whole time. In the Bihar School version the head lifts toward the knee. That is a harder variation, covered below.
Why the right leg first?
Many teachers start with the right knee because the large intestine runs up the right side of the belly, across, and down the left side. Pressing right, then left, follows that direction. It is a sensible teaching idea. No study has shown that the order changes the result, so if you forget, nothing is lost.
Benefits of Wind-Removing Pose
The main thing it gives you is a gentle, easy stretch for the lower back and the back of the hips, with the floor supporting everything else.
- Lower back: hugging the knees rounds the lumbar spine and lengthens the muscles along it. It feels good after backbends, after standing a long time or first thing in the morning.
- Hips and glutes: it takes the hip joint into deep flexion and stretches the gluteus maximus of the bent leg.
- Front of the straight leg: keeping the other leg long on the floor gives a mild stretch to the hip flexors on that side.
- Trapped gas: the thigh presses on the belly and the position changes the pressure around the intestines. Many people find it helps them pass wind, which is what the name promises. It is a common and practical use, and it is still based on experience more than on research.
The claims you read elsewhere go much further: curing constipation, balancing acid levels, burning belly fat, toning the arms. There is no good evidence for any of them. Hugging your knees for half a minute does not change the chemistry of your blood, and it does not shrink fat in one spot. Calm, slow breathing while you lie on your back does help you relax, and a relaxed belly may be easier to digest with. That is as far as we can go.
Who should skip or modify the pose
- Pregnancy: skip the pressure on the belly. Later in pregnancy many people also feel unwell lying flat on the back. Take the knees wide to the sides instead, or practise on your side.
- Recent surgery on the belly, hip or knee, or a hernia: ask your doctor or physiotherapist first. After a hip replacement, deep hip flexion is often restricted for months.
- Disc problems or acute back pain: rounding the lower back feels good for some and worse for others. Hold the backs of the thighs, keep the pull light, and stop if pain runs down the leg.
- Neck problems: keep the head down. Do not lift it toward the knee.
- Sore knees: hold the back of the thigh instead of the shin, so the knee is not squeezed shut.
- A full stomach: wait two to three hours after a meal. With food in the stomach the pressure is uncomfortable.
Common mistakes
- Lifting the head and shoulders by habit. Unless you choose the nose-to-knee variation, the back of the head stays on the floor and the neck stays soft.
- Pulling the knee to the centre of the chest. The knee goes to the side of the chest, toward the armpit. That gives the belly and the ribs room.
- Tailbone lifting off the floor. If the hips curl up, you have pulled too hard. Ease off until the sacrum rests down.
- Elbows flaring wide. Keep them close to the body. You pull with the arms, the shoulders stay relaxed.
- Holding the breath. The pose works on the exhale, when the belly softens. Breathe slowly the whole time.
- Straight leg lifting or rolling out. Let it rest long on the floor, heel down, toes pointing up.
Preparatory poses
Pavanamuktasana is a warm-up in itself, so it needs little preparation. These fit well before it:
- Savasana (Corpse Pose): a minute on your back to settle the breath. In the Hot 26 sequence you move straight from Savasana into Wind-Removing Pose.
- Setu Bandha Sarvangasana (Bridge Pose): opens the front of the hips before you fold them closed.
- Matsyasana (Fish Pose): a gentle opening of the chest and upper back.
Follow-up poses
- A supine twist: let both knees fall to one side with the shoulders on the floor. Our guide to yoga twists and how to twist safely goes through it.
- Halasana (Plow Pose): the next step if you want a deeper stretch for the back of the body.
- Salamba Sarvangasana (Shoulderstand): often paired with Plow.
- Bhujangasana (Cobra Pose): in the Hot 26 sequence the floor series goes from Wind-Removing Pose to the belly-down backbends, starting with Cobra.
Pavanamuktasana variations
- Eka Pada Pavanamuktasana (One-Legged Wind-Removing Pose): one knee at a time, the other leg long. The version in the steps above.
- Dwi Pada Pavanamuktasana (Both-Legs Wind-Removing Pose): both knees together, also called Apanasana. On each inhale let the knees move a little away, on each exhale draw them in.
- Supported one-legged version: bend the straight leg and place the foot on the floor. Easier on a tight hip flexor or a sensitive lower back.
- With a strap: loop a strap around the shin if your hands do not reach, or if a large belly or chest is in the way. You can also draw the knee slightly out to the side, toward the armpit, to make room.
- Nose to knee: on an exhale, lift your head and bring your nose toward the knee. This works the abdominal muscles and loads the neck, so keep it for a healthy neck.
- Rocking: with both knees hugged in, rock gently forward and back along the spine 5-10 times. It massages the muscles along the back. Do it on a soft mat.
For more easy floor poses to start with, see our list of essential yoga poses for beginners, and the full list of the 26 Bikram yoga poses. For a class built around the belly, try Digestive Health, 15 minutes of simple stretches lying down.
To practise the pose in the Hot 26 order, take the class Hot 26 Spine Series: it opens with Wind-Removing Pose and goes on to the backbends, level 1, 15 minutes.
Frequently asked questions
What is Pavanamuktasana and what are its benefits?
Pavanamuktasana, or Wind-Removing Pose, is a lying-down pose where you hug one or both knees to your chest. It stretches the lower back and the glutes, gives the hip flexors of the straight leg a mild stretch, and many people find it helps them pass trapped gas.
Does Pavanamuktasana relieve gas?
For many people, yes. The thigh presses on the belly and the change of position can help trapped gas move. That is the traditional use behind the name. The evidence is mostly practical experience, and it works best on an empty stomach with slow, relaxed breathing.
Which disease is cured by Pavanamuktasana?
None. You will find claims that it cures constipation, acidity or back pain, but there is no good research behind them. It is a gentle stretch that can ease a stiff lower back and help with bloating. For any ongoing digestive or back problem, see a doctor.
Who should not do Pavanamuktasana?
Skip or modify it if you are pregnant, have had recent surgery on the belly, hips or knees, have a hernia, or have acute back pain or a disc problem that flexion makes worse. With a sore neck, keep the head on the floor. Wait two to three hours after a meal.
How long should you hold Wind-Removing Pose?
Hold each side for 5-10 slow breaths, about 20-30 seconds, then both knees for the same time. Repeat the round once or twice. In the Hot 26 sequence it is 20 seconds per side and two sets.
When is the best time to do Pavanamuktasana?
In the morning before breakfast or at the start of a floor practice, always on an empty stomach. Many people also use it in bed in the evening to relax the lower back before sleep.
Is Pavanamuktasana the same as Apanasana?
Nearly. Apanasana usually means the both-knees version, often with the knees moving in and out with the breath. Pavanamuktasana covers the one-legged and the both-legs versions. The shape of the pose is the same.
Practise it with a teacher
Over 600 online yoga classes and programs for $4.99 a month. Cancel any time.
Become a member