Halasana (Plow Pose): How to Do It Step by Step

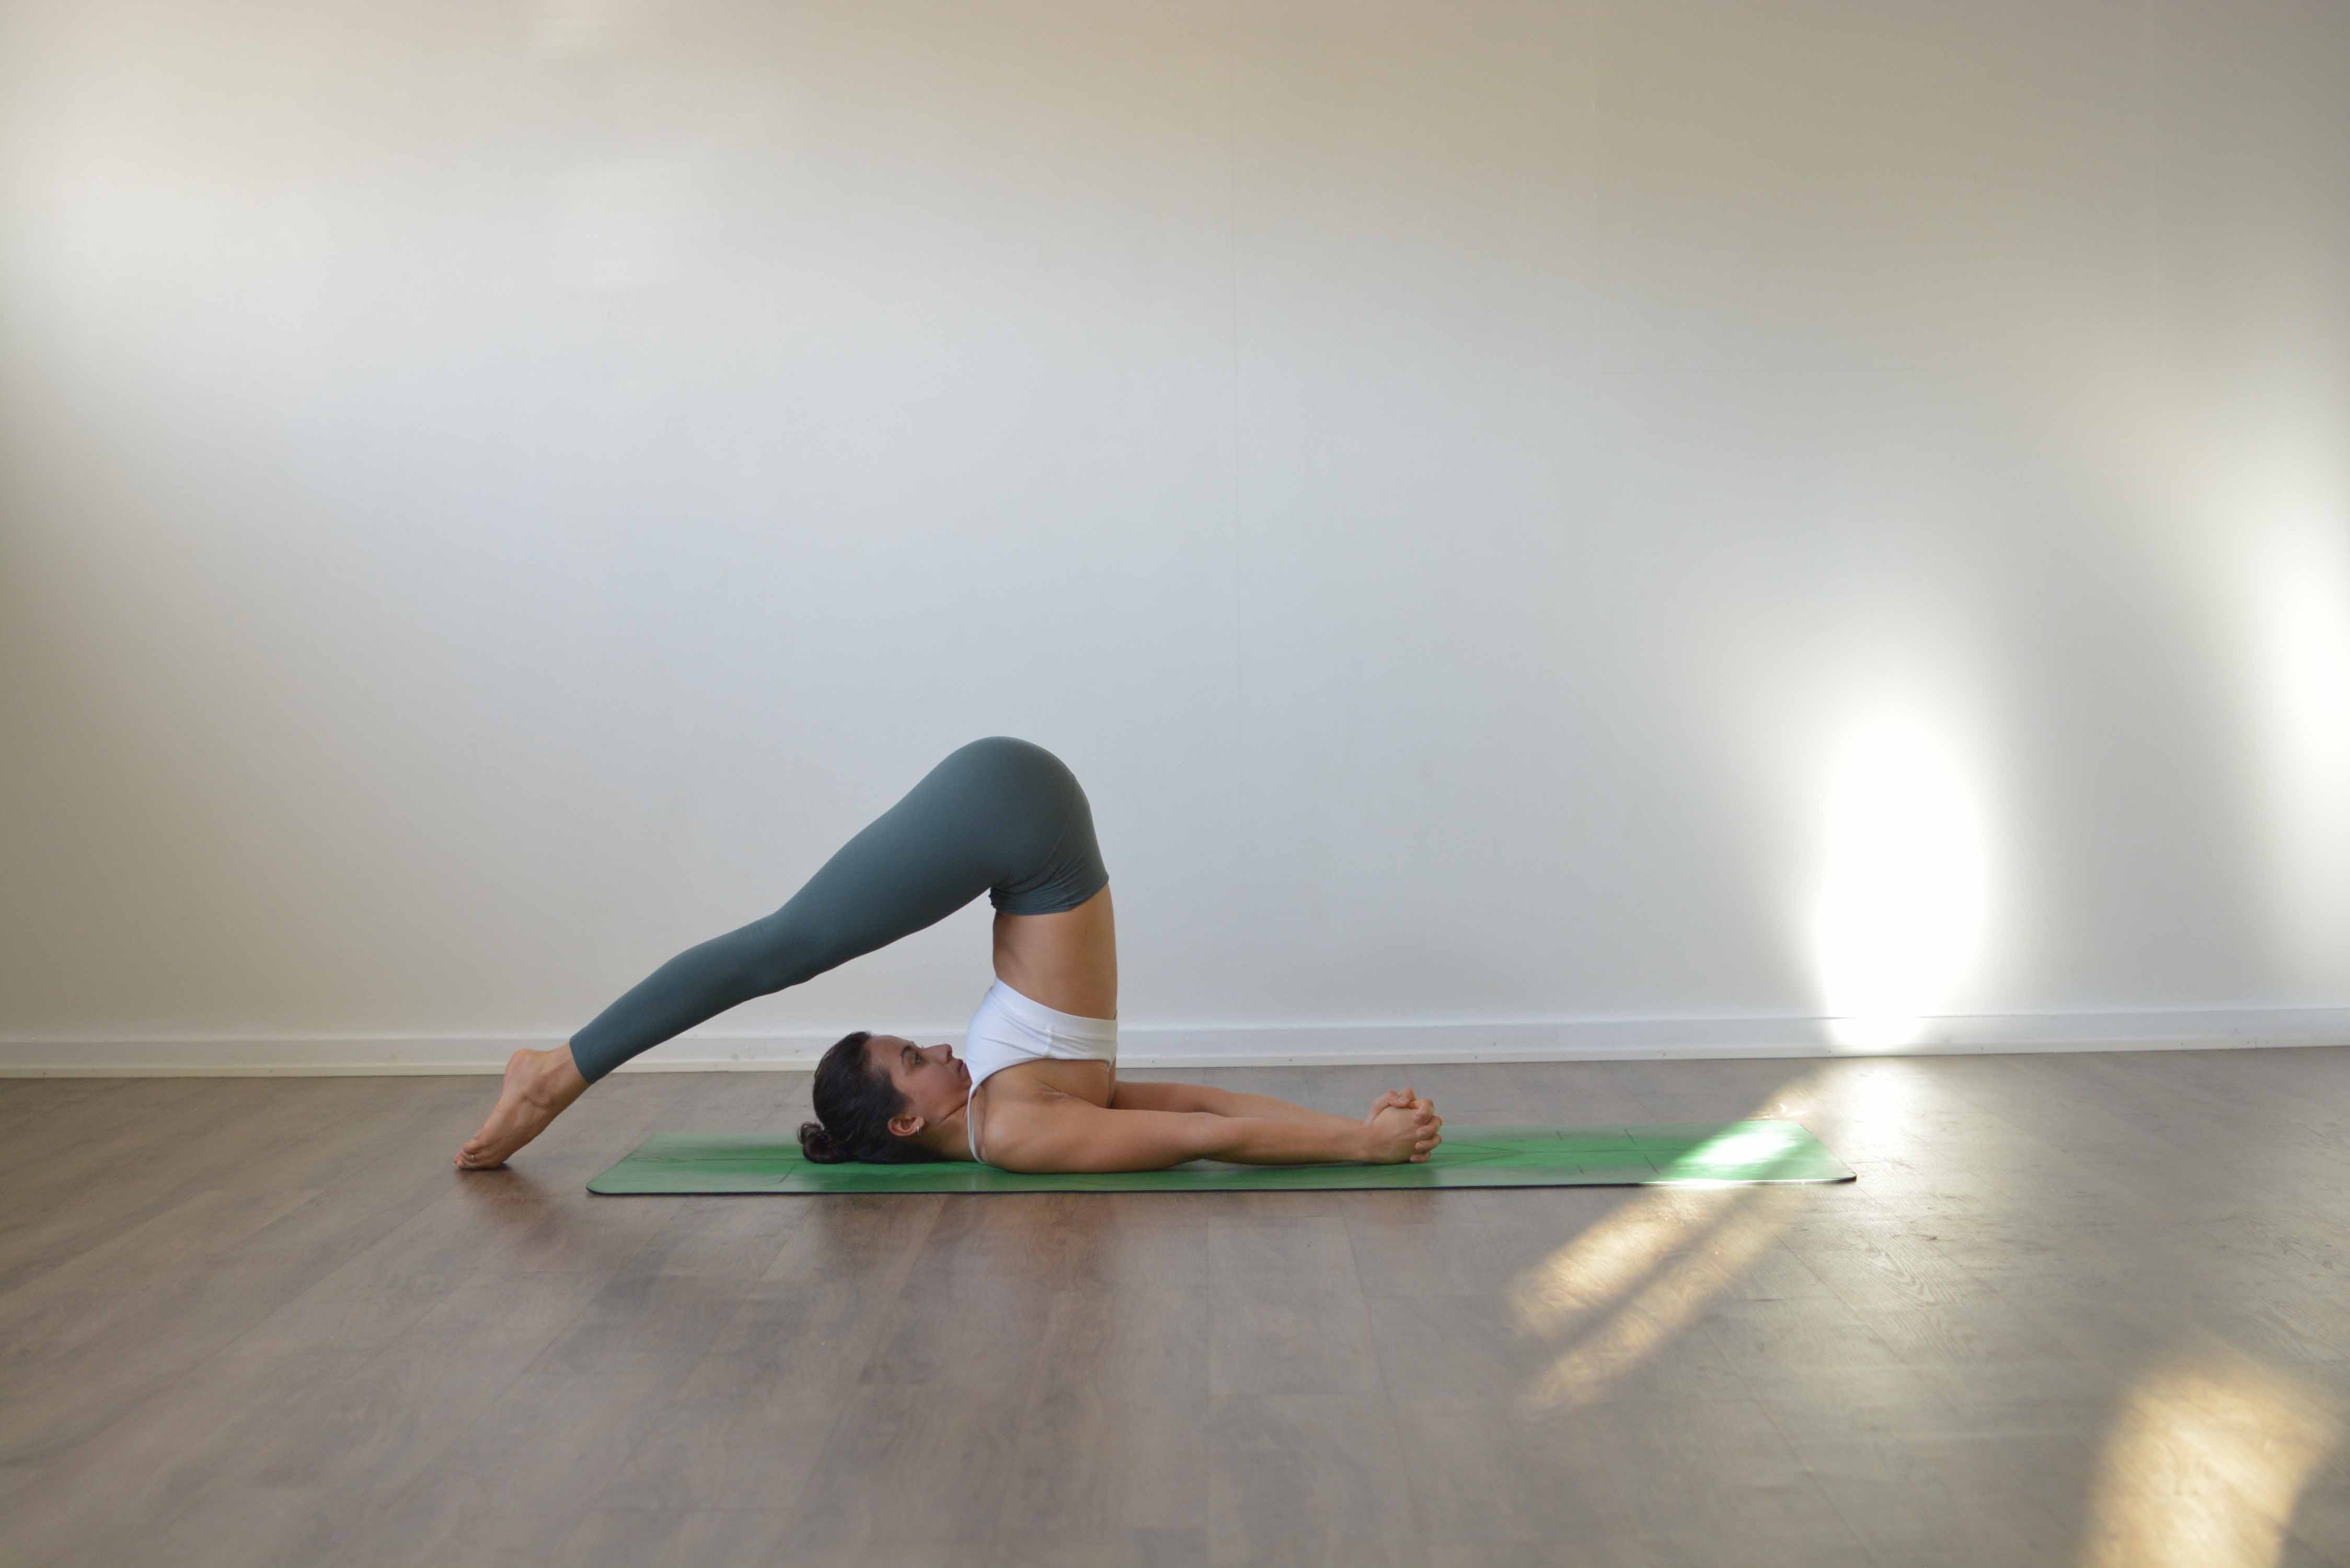
Halasana (Plow Pose) is an inverted forward bend. You lie on your back, lift your hips over your shoulders and lower your feet to the floor behind your head, so the body takes the shape of a traditional plough. It stretches the whole back of the body, from the neck to the heels, and it is usually practised together with Salamba Sarvangasana (Shoulder Stand) near the end of a class.
Pose type: inversion, forward bend. Level: intermediate. Props: two or three folded blankets under the shoulders, a chair or a wall if the feet do not reach the floor.
What Halasana means
Hala is Sanskrit for plough and asana means seat or posture. Seen from the side, the straight legs are the handle and blade of the old wooden plough used across India, and the torso is its upright frame. Say it in four even syllables: ha-LAA-sa-na, with the stress on the long second a.
The plough has its place in Indian storytelling. In the Ramayana, King Janaka finds a baby girl in a furrow while he ploughs a field for a ritual. He names her Sita, and she grows up to marry Rama. The same epic gives its name to Hanumanasana (Monkey Pose), after the hero who leaps to Lanka to find her. The pose borrows the image. The story is about the plough, not about the posture.
How to do Halasana, step by step
Set up before you go up. Fold two or three blankets into a firm, even stack and lie down with your shoulders on the stack and your head on the floor beyond its edge. The height keeps a little curve in your neck and takes the weight off the cervical spine.
- Lie on your back with your legs straight, arms beside you, palms down. The tops of the shoulders rest on the blankets, about two fingers from the edge.
- Bend your knees and bring the feet close to your hips. Breathe in.
- Breathe out and press your arms into the floor. Use your belly to roll your hips up off the floor and bring your knees toward your forehead.
- Place your hands on your back, fingers pointing up, and walk them toward your shoulder blades. Lift the hips until they sit over the shoulders.
- Straighten your legs and lower your toes to the floor behind your head. If they do not reach, rest them on the seat of a chair or on a wall, or keep your hands on your back and the legs in the air.
- When the toes are down, you can take the hands off your back, stretch the arms along the floor away from the feet and interlace the fingers. Press the little-finger edges of the hands down and roll your shoulders under you.
- Lift the thighs up toward the ceiling so the back stays long. Keep your head still and look toward your chest or the tip of your nose.
- Breathe slowly through the nose for 5 to 10 breaths to begin with. To come out, put your hands on your back again, bend your knees and roll down one vertebra at a time. Keep your head on the floor until your hips are down.
Your chin moves toward your chest on its own in this pose. In the Ashtanga and Iyengar traditions this is described as Jalandhara Bandha, the chin lock. Let it happen. Do not press the chin down harder.
Benefits of Plow Pose
Plow is a strong stretch for the back of the body. That is what you feel, and it is what the pose reliably does.
- Back of the legs and spine: with the legs straight and the hips over the shoulders, the hamstrings, calves and the long muscles along the spine lengthen together.
- Shoulders: with the hands interlaced behind you, the fronts of the shoulders open and the upper back learns to carry weight.
- Control: rolling up and down slowly takes work from the abdominal muscles, and holding the hips over the shoulders asks the back muscles to stay active.
Many people find Plow calming near the end of a practice, when the breath slows down and the eyes close. Claims that it massages the thyroid, cures digestive problems or melts belly fat are widely repeated. No good study supports them.
Who should skip or modify Plow Pose
In full Plow, part of your body weight rests on the neck, and the neck is bent forward as far as it goes. That is the risk in this pose. Most injuries come from lying flat on the floor without blankets and from moving the head while you are up.
- Skip it if you have a neck injury, a disc problem in the neck or upper back, or pain that spreads into the arms.
- Skip it if you have osteoporosis or low bone density. Loaded forward bending of the spine is linked to compression fractures of the vertebrae.
- Ask your doctor first if you have glaucoma, a detached retina or high blood pressure that is not under control. Inversions raise the pressure in the head and eyes.
- Modify during pregnancy, especially from the second trimester: the belly is folded and pressed, and legs on a chair or a restful pose on your back work better.
- Modify if your feet do not reach the floor. Hanging the legs over your head with a rounded back loads the neck more. Use a chair.
- Come out if you feel pain in your neck, pressure in your head or a tingling in the arms.
Some teachers advise against inversions during menstruation. That comes from yoga tradition, not from medical evidence, and you can decide for yourself. More on practising without injury in our 10 tips to avoid yoga injuries.
Common mistakes
- Turning the head. Looking sideways while the neck carries weight twists it under load. Keep the head still and centred. If you need to look, come down first.
- No blankets. Flat on the floor, the neck takes more of the weight. Use a firm stack under the shoulders.
- Rounded back, heavy hips. When the hips drop behind the shoulders, the weight slides toward the neck. Keep the hands on the back and lift the hips up.
- Forcing the feet down. The toes do not need to touch the floor. Bend the knees or use a chair.
- Elbows sliding wide. Draw the elbows toward each other so the upper arms form a base.
- Kicking up. Swinging the legs over with momentum lands the weight on the neck. Roll up with control.
- Dropping out. Coming down fast makes the spine hit the floor. Roll down slowly.
Preparatory poses
Plow needs open hamstrings, open shoulders and a strong back. These build all three:
- Setu Bandha Sarvangasana (Bridge Pose): lifts the hips from the floor and teaches you to roll the shoulders under you.
- Paschimottanasana (Seated Forward Bend): the same fold as Plow, the right way up.
- Pavanamuktasana (Wind-Relieving Pose): knees to chest, a gentle way to round the lower back.
- Adho Mukha Svanasana (Downward-Facing Dog): lengthens the hamstrings and calves with the head below the hips.
- Salamba Sarvangasana (Shoulder Stand): the usual way into Plow. Many people lower the legs from Shoulder Stand into Halasana.
Follow-up poses
- Matsyasana (Fish Pose): the classic counterpose. The chest lifts and the neck moves in the other direction.
- Balasana (Child's Pose): a quiet forward fold if Fish is too much for your neck.
- Savasana (Corpse Pose): lie flat for a few minutes and let the back settle.
After you roll down, lie on your back for a few breaths before you lift your head.
Halasana variations
- Half Plow with a chair: the toes rest on the seat of a chair behind your head, the thighs parallel to the floor. The best version for most people learning the pose.
- Karnapidasana (Ear Pressure Pose): from Plow, bend the knees down beside the ears. This is the next pose in the Ashtanga closing sequence.
- Supta Konasana (Reclined Angle Pose): from Plow, walk the feet wide apart and hold the big toes.
- Parsva Halasana (Side Plow): walk both feet to one side and keep the hips level, then to the other side. A strong variation for experienced students.
- Chakrasana: in Ashtanga, a backward roll through Plow with the hands beside the head, landing in Chaturanga. Learn it with a teacher.
Where Plow Pose comes from
Halasana is not among the postures of the Hatha Yoga Pradipika. It belongs to 20th-century yoga, above all the teaching of Krishnamacharya and his students. B.K.S. Iyengar describes it in detail in Light on Yoga (1966), where he calls Sirsasana (Headstand) the king of the asanas and Sarvangasana their queen, or mother. In the Ashtanga Primary Series, Halasana comes right after Shoulder Stand in the closing sequence, with the gaze toward the tip of the nose. The drishti, the yoga gaze, is part of the pose there.
To practise Plow inside a full sequence, start with our Ashtanga Fundamentals program or browse the Ashtanga yoga classes.
Frequently asked questions
What are the benefits of Halasana?
Halasana stretches the back of the body: the hamstrings, the calves and the muscles along the spine. With the hands interlaced behind you it also opens the fronts of the shoulders. Rolling up and down with control works the abdominal muscles. Many people find it calming near the end of a practice.
Who should not do Halasana?
Skip Plow if you have a neck injury, a disc problem in the neck or upper back, or osteoporosis. Ask your doctor first if you have glaucoma, a detached retina or uncontrolled high blood pressure. In pregnancy, especially later on, choose a gentler pose. Everyone else should use blankets under the shoulders.
Can Halasana reduce belly fat?
No. You cannot burn fat in one part of the body by working that area, and a pose held for a few breaths uses little energy. Halasana works the abdominal muscles when you roll up and down, but fat loss comes from overall activity and diet.
Who is the mother of all asanas?
In Light on Yoga, B.K.S. Iyengar calls Sarvangasana (Shoulder Stand) the queen or mother of the asanas and Sirsasana (Headstand) the king. Halasana is usually practised right after Shoulder Stand, so the two are often taught as a pair.
How long should you hold Plow Pose?
Start with 5 to 10 slow breaths, about 30 seconds to a minute. With practice and a good setup, experienced students stay for several minutes. Come down as soon as you feel pain in the neck or pressure in the head.
Is Plow Pose bad for your neck?
It can be when it is done flat on the floor, with the hips dropped behind the shoulders or with the head turning. Fold blankets under your shoulders with your head off the edge, keep your hands on your back to lift the hips, and keep your head still.
What if my feet don't reach the floor in Plow?
Rest them on the seat of a chair or on a wall behind your head, or keep your knees bent. Hanging the legs in the air with a rounded back puts more weight on the neck. The pose works without the toes on the floor.