Dandayamana Bibhaktapada Janushirasana (Standing Separate Leg Head to Knee Pose): How to Do It Step by Step

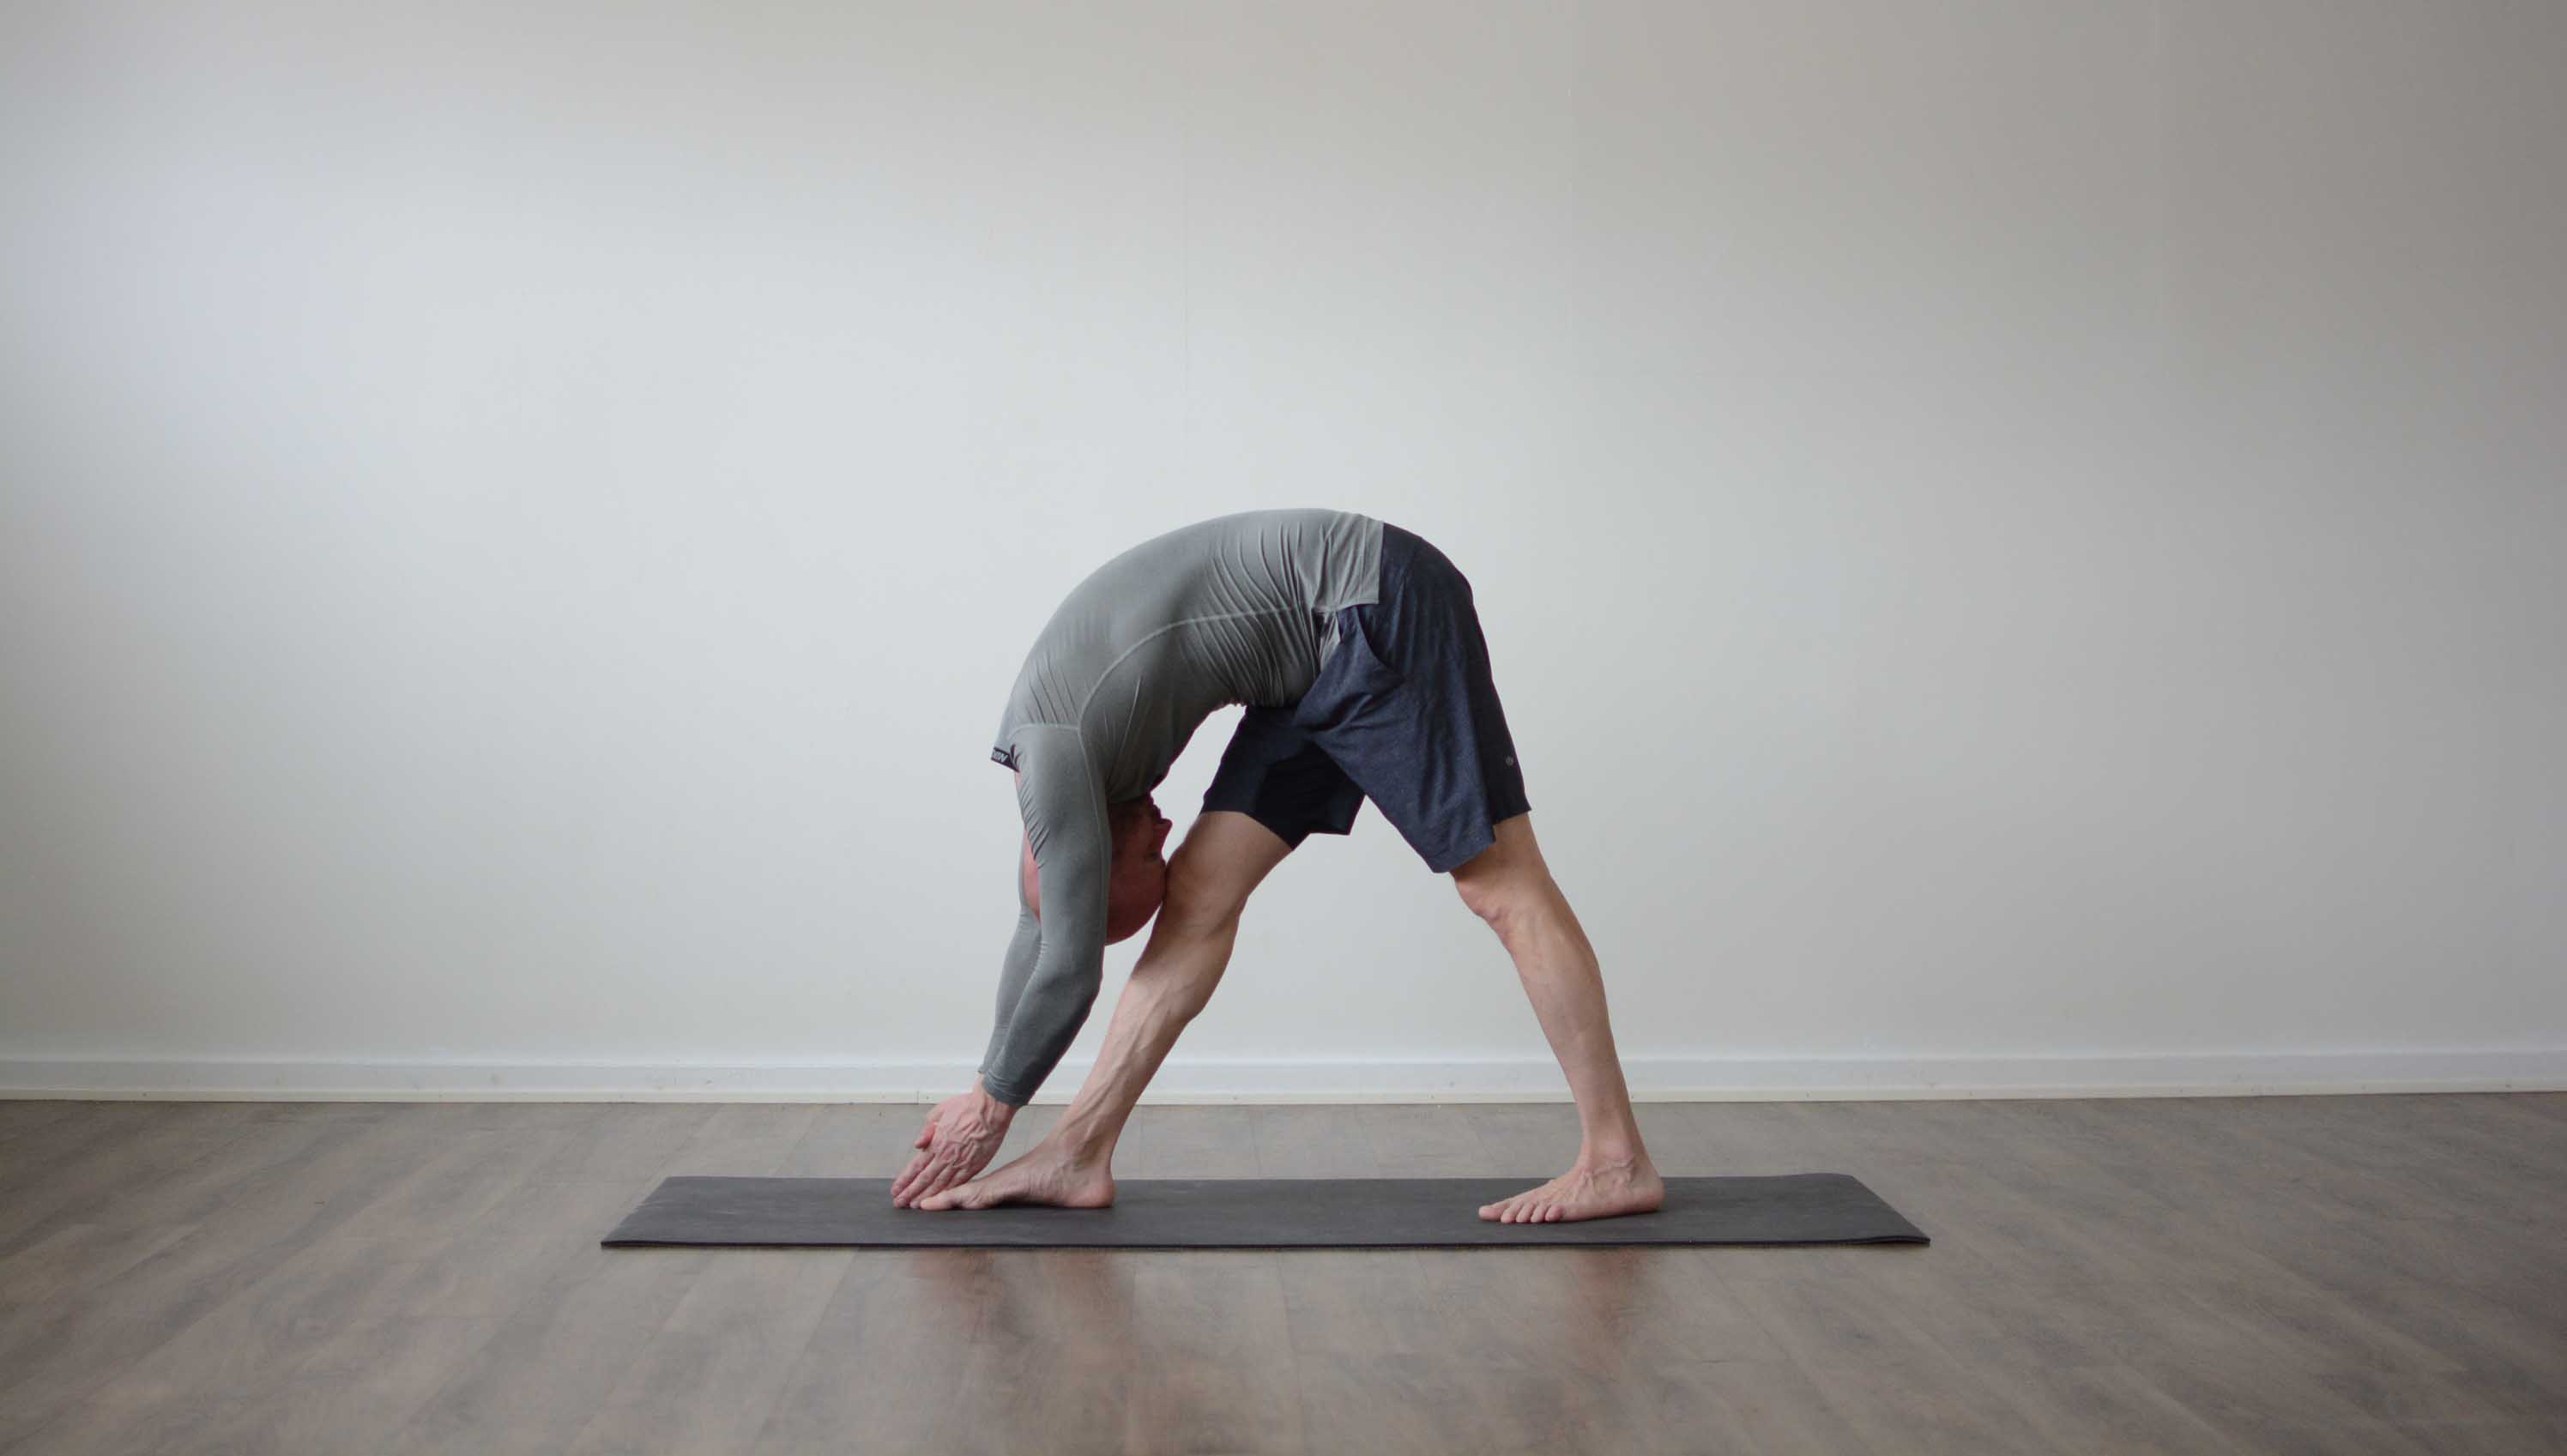
Dandayamana Bibhaktapada Janushirasana (Standing Separate Leg Head to Knee Pose) is a standing forward bend in which you stand with one foot in front of the other, both legs straight, and curl your spine down until your forehead touches the front knee and your fingertips, pressed together in prayer, touch the floor. It is the tenth pose in the Bikram sequence of 26 poses, counting the opening breathing exercise. It stretches the back of the front leg hard, and it asks for a strong chin tuck and a firm belly.
Pose type: standing forward bend. Level: beginner to intermediate, with a bent front knee as the beginner stage. Props: none, blocks under the hands if the floor is far away.
What the name means
The Sanskrit name is long because it describes the whole shape: dandayamana, standing like a staff, bibhakta, separated, pada, foot or leg, janu, knee, shira (also written sirsa), head, and asana, posture. Standing, with the legs apart, head to knee. The name and the rounded form come from the Bikram and hot yoga tradition of the 1970s. The closest classical pose is Parsvottanasana (Intense Side Stretch, often called Pyramid Pose), which B.K.S. Iyengar taught with a long, flat back and the hands in reverse prayer behind it.
How to do Standing Separate Leg Head to Knee Pose, step by step
This is the hot 26 version. The instructions are for the right side first.
- Stand with your feet together. Bring your palms together in front of your chest, then stretch your arms up overhead, palms still pressed together, arms close to your ears.
- Step your right foot out to the side, about three to four feet, the length of one of your own legs.
- Turn your whole body to the right. The right foot points straight ahead. Turn the left foot in, about 45 degrees, so the back heel can stay on the floor. Square both hips toward the front foot.
- Tuck your chin to your chest and pull your belly in. Keep the arms by your ears, so head and arms move as one unit.
- Exhale and curl down over the front leg, one vertebra at a time, until your fingertips, still in prayer, touch the floor in front of your right foot and your forehead meets your right knee.
- Straighten both legs by lifting the kneecaps with the front of the thighs. Keep the chin tucked and the back rounded. Breathe slowly through the nose.
- Hold for about 20 seconds. On an inhale, come up with the arms and head together, turn to the front, step the feet together and repeat on the left side.
In a hot 26 class the pose is usually done twice on each side, the second set a little shorter than the first.
The beginner stage
Bend the front knee as much as you need to touch it with your forehead. The contact of head and knee, with the chin tucked, is the pose. Straighten the leg a little more over the weeks as the hamstrings allow. If the floor is out of reach, put your hands on blocks on either side of the front foot. Separating the hands this way also makes the balance easier.
Benefits of Standing Separate Leg Head to Knee Pose
The pose is a strong stretch for the back of the front leg, and the long split stance adds a balance challenge that a two-footed fold does not have.
- Hamstrings and calves: the front leg is straight and the hip is flexed deeply, so the hamstrings and the calf of that leg lengthen. Our guide to hamstrings and yoga explains how these muscles respond to stretching.
- Legs: the quadriceps of both legs work to keep the knees straight, and the muscles around the hips and ankles hold the narrow stance steady.
- Back of the body: the rounded shape stretches the muscles along the spine and the back of the neck.
- Belly: pulling the stomach in to round the spine works the deep abdominal muscles.
Older texts on this pose promise a slimmer waist and help for the thyroid, the kidneys and the mind. The belly muscles do work here, but no study shows that a pose reduces fat in one spot, and the organ claims have no evidence behind them. What you can count on is the stretch, the leg work and 20 quiet seconds of breathing with your head down.
Who should skip or modify the pose
- Disc problems in the lower back: loaded, rounded forward bending is the movement most often advised against with a bulging or herniated disc. Choose a flat back, a bent knee and hands on blocks, or skip the pose, and ask your physiotherapist.
- High blood pressure, glaucoma or dizziness: the head is below the heart. Come up slowly, and stop if you get dizzy, especially in a heated room.
- Hamstring injury: a fresh tear or pain where the hamstring attaches under the sitting bone gets worse with deep stretching. Bend the front knee a lot, or leave the pose out until it has settled.
- Knees that bend backward: if your knees hyperextend, straighten them with the thigh muscles and keep a tiny bend rather than pushing the knee joint back.
- Pregnancy: the chin tuck and the pulled-in belly do not suit a growing bump, and the balance changes. Take a wider stance, a flat back and your hands on blocks.
For more on practising without injury, read our 10 tips to avoid yoga injuries.
Common mistakes
- A stance that is too long. If the back heel lifts or you wobble, step the feet closer together.
- Feet on one line. Heel to heel is narrow and tippy. Keep the feet a few centimetres apart sideways, like on railway tracks.
- Hips turned open. If the back hip swings out, the stretch leaves the front hamstring. Draw the front hip back and the back hip forward.
- Reaching with the head. Lifting the chin to get the forehead to the knee strains the neck. The chin stays on the chest and the whole spine curls.
- Locking the knee from the joint. "Lock the knee" in hot yoga means firming the thigh. The knee joint itself should not press backward.
- Holding the breath. The belly is pulled in, but the breath keeps moving. Breathe slowly through the nose.
Preparatory poses
These open the hamstrings and teach the rounded fold:
- Padahastasana (Hands to Feet Pose): a forward fold on two feet, with the same chin tuck.
- Dandayamana Bibhaktapada Paschimottanasana (Standing Separate Leg Stretching): the wide-legged fold that comes earlier in the hot 26 sequence.
- Trikonasana (Triangle Pose): the same kind of split stance, with the hips turned to the side.
- Adho Mukha Svanasana (Downward-Facing Dog): lengthens the calves and hamstrings of both legs at once.
Follow-up poses
- Vrksasana (Tree Pose): comes next in the hot 26 sequence and moves you from a fold into an upright balance.
- Padangustasana (Toe Stand Pose): the last pose of the standing series.
- Janu Sirsasana (Head to Knee Pose): the seated head to knee forward bend, one leg at a time.
- Balasana (Child's Pose): a rest with the spine rounded and the head supported.
Variations
- Bent front knee: as much bend as you need to bring forehead and knee together.
- Hands apart: fingertips or palms on the floor or on blocks on either side of the front foot, for balance.
- Parsvottanasana (Pyramid Pose): the same legs with a long, flat back and the hands in reverse prayer or on blocks. A good choice if rounding does not suit your back.
- Standing Head to Knee on one leg: Dandayamana Janushirasana (Standing Head to Knee Pose), the fifth pose in the sequence, folds over a lifted leg instead.
Where the eyes go matters in a fold this deep. The traditional gaze is toward the nose or the knee, and our guide to drishti, the yoga gaze, explains why.
Round back or flat back
Teachers disagree about the spine in this pose, and both sides have a point. In the hot 26 tradition the rounding is the point: chin to chest, forehead to knee, a stretch along the whole back of the body. Teachers from the Iyengar lineage fold over the same leg with a long spine, because a flat back moves the stretch into the hamstrings and puts less load on the discs. If your back is healthy, both are fine to practise. If you have a disc problem, the flat-back version is the safer one. Hot yoga teachers also say "lock the knee", while many other teachers ask for a micro-bend. They mean nearly the same thing: a straight leg held by the thigh muscles, never a knee pushed back into the joint.
To practise the pose in its place in the sequence, follow Lauren Matters through the Hot 26 standing series, or read our overview of hot yoga styles first.
Frequently asked questions
What is Standing Separate Leg Head to Knee Pose?
It is a standing forward bend from the Bikram hot yoga sequence. You stand with one foot in front of the other, both legs straight, and round your spine down until your forehead touches the front knee and your fingertips, in prayer, touch the floor. Its Sanskrit name is Dandayamana Bibhaktapada Janushirasana.
What are the benefits of Standing Separate Leg Head to Knee Pose?
It stretches the hamstrings and calf of the front leg and the muscles along the spine, works the thighs to keep both knees straight, and trains balance in a narrow split stance. Claims that it slims the waist or helps the thyroid are not supported by research.
Who should not do this pose?
Skip it or use a flat back and blocks if you have a disc problem in the lower back, a hamstring injury, glaucoma or blood pressure that is hard to control. In pregnancy, take a wider stance with a flat back. Come up slowly if you feel dizzy.
How long should you hold the pose?
In a hot 26 class you usually hold it for about 20 seconds on each side, then repeat a second, shorter set. At home you can stay for five to eight slow breaths per side, as long as the stretch stays in the muscle and not in the knee or the lower back.
Is it the same as Pyramid Pose?
The legs are the same. Pyramid Pose, Parsvottanasana, keeps the back long and flat, often with the hands in reverse prayer behind the back. The hot 26 version rounds the spine, tucks the chin and brings the forehead to the knee.
What if my forehead does not reach my knee?
Bend the front knee until it does. Forehead to knee with a bent leg keeps the shape of the pose, and you straighten the leg a little more as the hamstrings lengthen. Put blocks under your hands if the floor is far away.
Practise it with a teacher
Over 600 online yoga classes and programs for $4.99 a month. Cancel any time.
Become a member