Vasisthasana (Side Plank Pose): How to Do It Step by Step

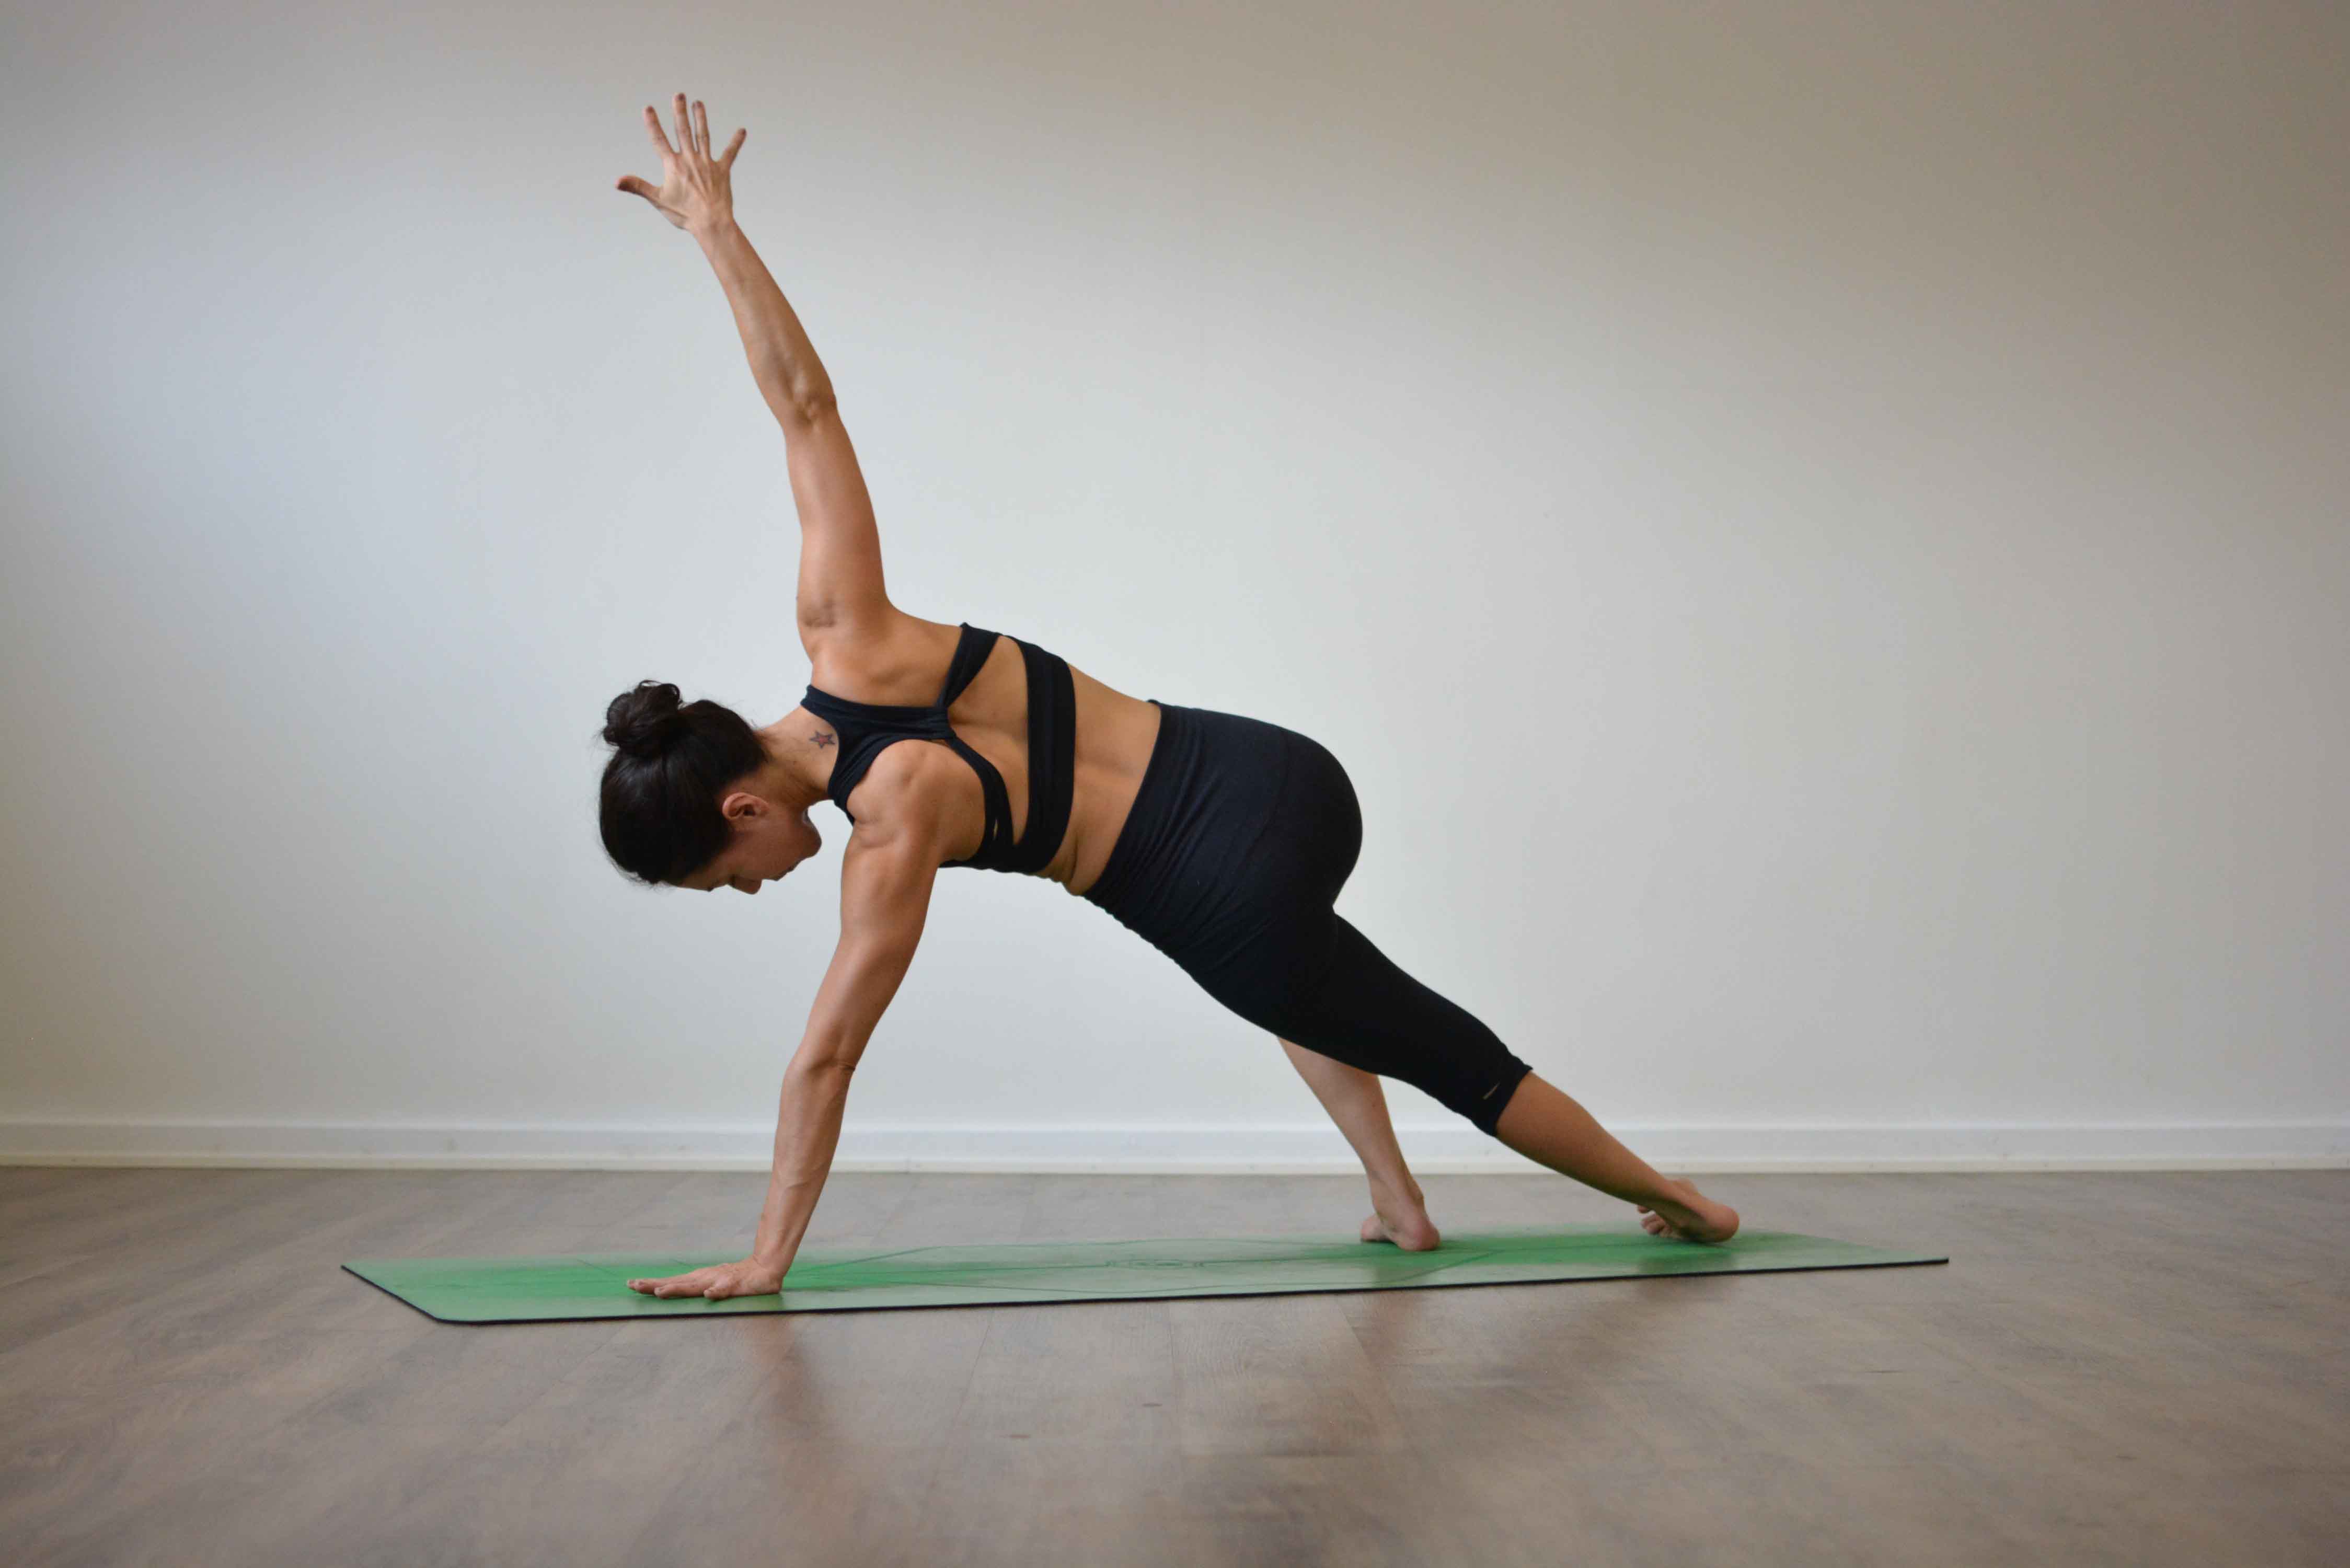
Vasisthasana (Side Plank Pose) is an arm balance in which you hold your body in one long line on the side, supported by one straight arm and the outer edge of one foot, with the other arm reaching up. It works the obliques, the side of the hip and the supporting shoulder all at once. Most people start with the bottom knee on the floor and move to the full pose as the shoulder and side body get stronger.
Pose type: arm balance, core strength, side body. Level: beginner with the knee down, intermediate in the full pose. Props: none needed. A wall or a block helps.
What Vasisthasana means
The pose is named after Vasistha, one of the seven great sages (the Saptarishi) of Hindu tradition. His name is the superlative of the Sanskrit word vasu, wealth or excellence, so it reads as "the most excellent" or "the richest". Asana means seat or posture. Say it vah-shish-TAH-sah-nah: the s in the middle is a soft "sh".
Vasistha appears in the Rigveda, where a whole book of hymns is credited to his family, and he is the teacher of Prince Rama in the Yoga Vasistha, a long text on jnana, the yoga of knowledge. The pose itself is much younger than the sage. It is not in the old hatha texts. B.K.S. Iyengar's Light on Yoga (1966) made it widely known, with the top hand holding the big toe of the raised leg. In most classes today "side plank" means the simpler form with both feet stacked, and that is the one taught below.

How to do Side Plank Pose, step by step
Warm up your wrists and shoulders first. A few rounds of Cat and Cow and a minute in plank are enough.
- Start in Plank Pose, shoulders over wrists, body straight from head to heels. Spread your fingers and press the whole hand into the floor.
- Move your right hand a few centimetres forward and toward the midline, so it sits under the right shoulder once you turn. This keeps the weight off the front of the shoulder.
- Roll onto the outer edge of your right foot and stack the left foot on top of it. Both legs are straight and active, inner thighs drawing toward each other.
- Turn your chest to the left and lift your left arm straight up, in one line with the right arm. Your body now faces the side of the room.
- Lift your hips. Press the bottom hip up away from the floor, as if a string pulled it toward the ceiling. Head, hips and heels form one line.
- Push the floor away with your right hand so the shoulder blade does not sink toward the ear. Keep a soft bend in the elbow if it tends to lock.
- Look forward, or turn your head to look at your top hand if your neck is comfortable. Breathe slowly through the nose for 3-5 breaths.
- To come out, bring the left hand back to the floor and return to plank, or lower to your knees. Repeat on the other side.
Hold both sides for the same number of breaths. If one side shakes much sooner, practise that side first while you are fresh.
Benefits of Side Plank Pose
Side Plank is a strength pose. Gravity pulls your hips toward the floor, and the muscles on the underside of the body hold you up.
- Side of the trunk: the obliques and the quadratus lumborum, the deep muscle between the lowest rib and the pelvis, hold the spine level. Exercise research on the side bridge, the physiotherapy version of this pose, shows these muscles working hard while the load on the lower back stays low.
- Side of the hip: the gluteus medius on the bottom leg keeps the hip from dropping. The same muscle keeps your pelvis level when you walk or stand on one leg.
- Supporting shoulder and wrist: the muscles around the shoulder blade hold the arm steady under part of your body weight.
- Balance: with a narrow base, the body has to make small corrections all the time, which trains control in the trunk and shoulder.
The top arm and the top side of the body get a light stretch, but the pose is mainly about strength. A small study from 2014 reported that daily side plank on one side reduced the curve in some people with scoliosis. It had no control group, so treat it as a lead worth following, and talk to your doctor or physiotherapist before you use yoga for a spinal curve.
Who should skip or modify Side Plank
- Wrist pain or carpal tunnel syndrome: use the forearm version, or keep the knee down so less weight goes through the hand.
- Shoulder injury or an unstable shoulder: start on the forearm with the knee down, and stop if you feel pain in the joint itself. Muscle effort in the shoulder is expected. A pinch at the front or top of the joint is not.
- Elbow that hyperextends: keep a micro-bend so the joint does not lock backward under load.
- Pregnancy: the knee-down version is usually fine early on if you already practise it. Later in pregnancy many teachers leave it out because it loads the stretched abdominal wall. Ask your midwife or doctor.
- High blood pressure: keep the holds short and keep breathing. Do not hold your breath to stay up.
More on practising without injury in our 10 tips to avoid yoga injuries.
Common mistakes
- Hips sagging. The bottom hip drops toward the floor and the pose turns into a hang in the shoulder. Lift the lower hip first, then check the line.
- Hips piking back. The bottom sticks out behind you and the body folds at the hips. Press the front of the hips forward until you are in one plane, as if you stood between two panes of glass.
- Hand too far forward or too far out. The shoulder ends up in front of the wrist and has to work much harder. Set the hand under the shoulder, or a little in front of it.
- Sinking into the shoulder. The neck shortens and the shoulder rises toward the ear. Push the floor away.
- Locked elbow. The weight rests on the joint instead of the muscles. Soften it.
- Holding the breath. Short, steady breaths through the nose. When the breath goes, come down.
Preparatory poses
- Plank Pose (Phalakasana): the start position, and where you learn to push the floor away.
- Adho Mukha Svanasana (Downward-Facing Dog): loads the hands and shoulders at a gentler angle.
- Trikonasana (Triangle Pose): the same open-chest shape standing on two feet.
- Ardha Chandrasana (Half Moon Pose): balance on one side with the hips stacked, with a leg instead of an arm as the base.
- Forearm plank: builds the trunk strength without loading the wrists.
Our article on core strength and yoga explains which muscles do the work and how to train them.
Follow-up poses
- Chaturanga Dandasana (Four-Limbed Staff Pose): in a flow, side plank often returns to plank and lowers through Chaturanga.
- Utthita Parsvakonasana (Extended Side Angle Pose): stretches the side body you worked in side plank.
- Parsva Bakasana (Side Crow): an arm balance that asks for the same side-body strength.
- Balasana (Child's Pose): rest the wrists and shoulders afterwards.

Vasisthasana variations
- Knee-down side plank: the bottom knee rests on the floor under the hip, shin pointing back. The best place to start.
- Staggered feet: the top foot stands on the floor in front of the bottom foot. A wider base and an easier balance.
- Forearm side plank: the elbow under the shoulder, forearm on the floor. Easier on the wrist and still hard for the trunk. Some teachers call it Bahu Vasisthasana.
- At the wall: the soles press into the wall, which takes away most of the balance so you can learn the line.
- Top leg lifted: raise the top leg parallel to the floor. Stronger work for the side of the hip.
- Full Vasisthasana: the top hand takes the big toe of the top leg and the leg straightens up toward the ceiling. This is the form in Light on Yoga, and it needs open hamstrings as well as strength.
- Kasyapasana and Visvamitrasana: two harder poses named after sages, which Iyengar groups with Vasisthasana.
In the Light on Yoga form the gaze goes up to the raised hand. If you want to work with it, our guide to drishti, the yoga gaze explains how.
Ready to practise on the mat: Side Planks is a 15-minute Vinyasa flow, level 1-2, that works through side planks on both sides, and you find more like it among our yoga strength classes.
Frequently asked questions
What are side planks good for?
Side Plank strengthens the side of the trunk (the obliques and quadratus lumborum), the side of the bottom hip (gluteus medius) and the supporting shoulder. It also trains balance, because the base is narrow. The load on the lower back stays low, which is why physiotherapists use the side bridge in back rehab.
How do you do a side plank correctly?
From plank, set the supporting hand under the shoulder, roll onto the outer edge of the bottom foot and stack the other foot on top. Lift the hips so head, hips and heels form one line, push the floor away and reach the top arm up. Breathe. If the hips sag, put the bottom knee down.
Is side plank harder than plank?
For most people, yes. In plank your weight is spread over two hands and two feet. In side plank it rests on one hand and the edge of one foot, so each shoulder and each side of the trunk carries more, and you have to balance as well.
How long should you hold a side plank?
In a yoga class, 3-5 slow breaths per side is common. Start there, or with 10-15 seconds, and add time as long as you can keep the hips lifted and the breath steady. Several short holds with good form do more than one long hold with sagging hips.
Is Vasisthasana good for beginners?
The knee-down version is. Put the bottom knee on the floor under the hip and keep the rest of the pose the same. When you can hold that for five steady breaths on each side, try with the legs straight and the feet staggered.
What if side plank hurts my wrist?
Move to the forearm version, with the elbow under the shoulder. Check also that the hand is under the shoulder and that you press through the whole hand, especially the base of the index finger, instead of sinking into the heel of the hand.
Practise it with a teacher
Over 600 online yoga classes and programs for $4.99 a month. Cancel any time.
Become a member