Utthita Parsvakonasana (Extended Side Angle Pose): How to Do It Step by Step

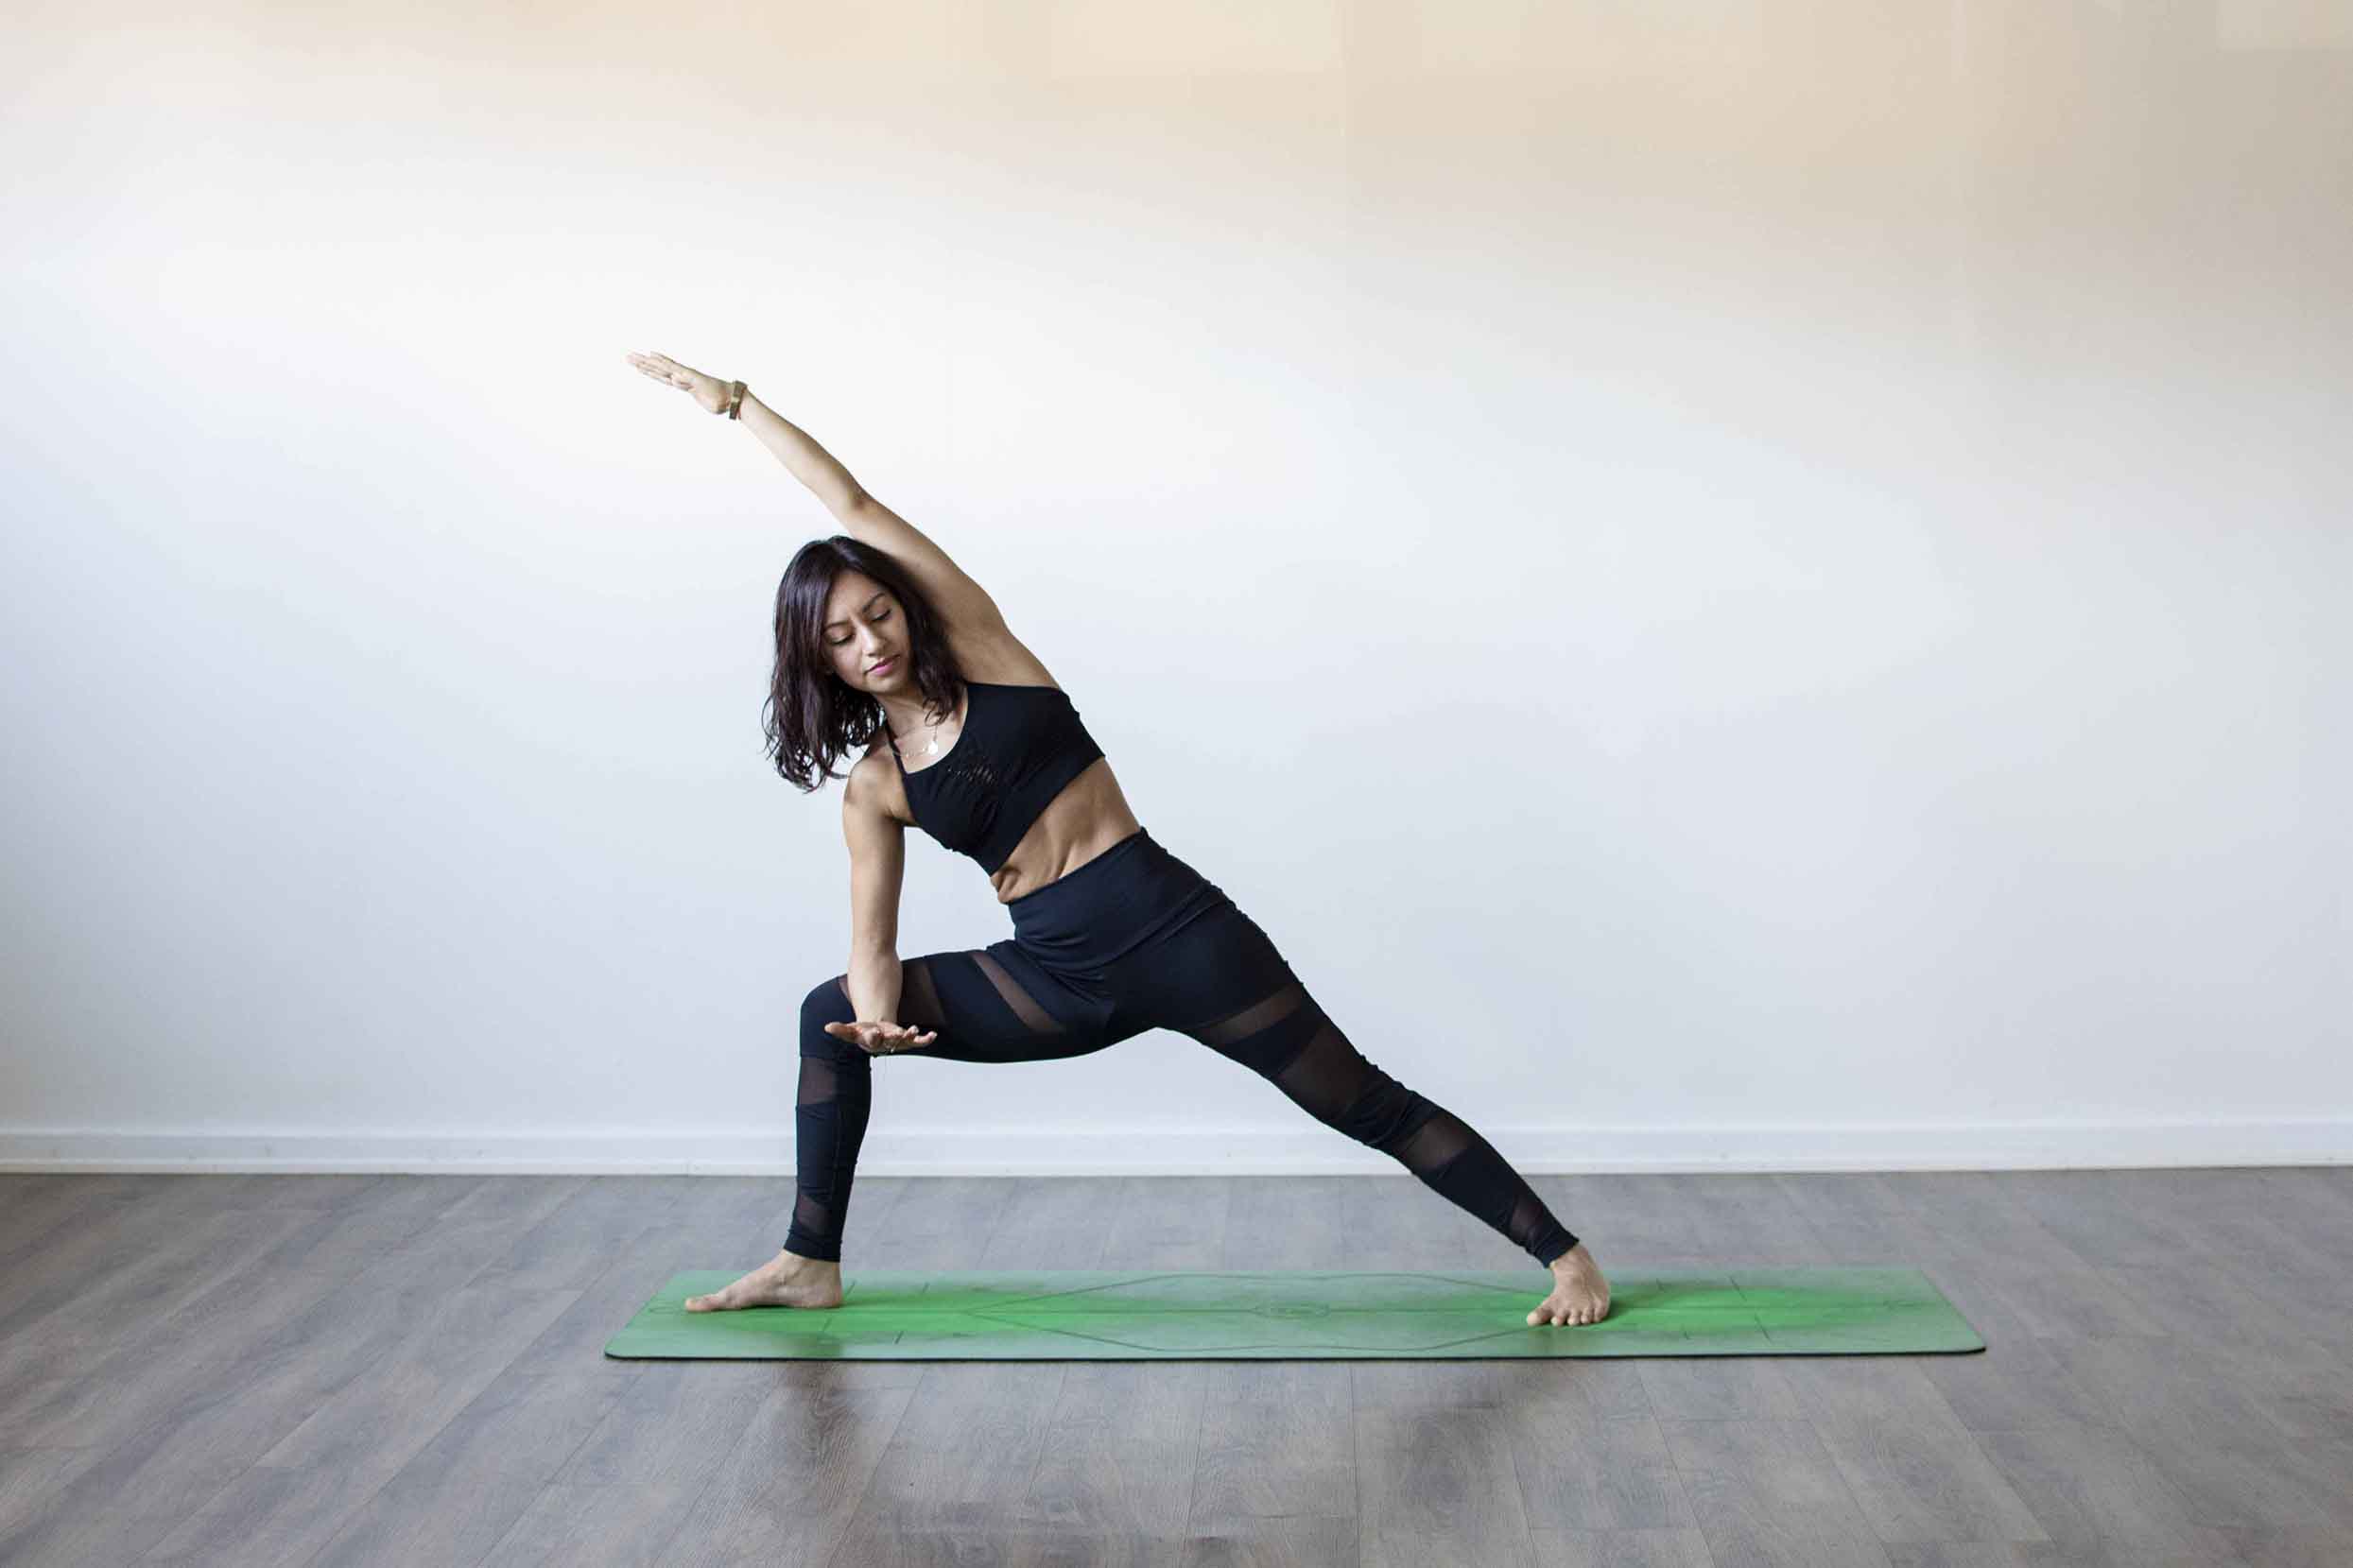
Utthita Parsvakonasana (Extended Side Angle Pose) is a standing yoga pose in which the front knee bends to a right angle, the lower hand rests on the floor or a block beside the front foot, and the top arm reaches over the ear. From the back heel to the top fingertips the body forms one long diagonal line. It strengthens the legs and stretches the whole side of the body, and it is one of the standing poses in both the Iyengar and the Ashtanga tradition.
Pose type: standing, side stretch, leg strength. Level: beginner to intermediate. Props: a block for the lower hand, a wall for the back heel if you slide.
What Utthita Parsvakonasana means
The name is built from four Sanskrit words: utthita, extended, parsva, side or flank, kona, angle, and asana, posture. The angle is the one between the bent front leg and the torso, and the extension is the stretch that runs along the flank. Say it roughly as oo-TEE-tah parsh-vah-koh-NAH-sah-nah.
The pose has no roots in the medieval hatha texts. It comes from the 20th century standing sequences of Krishnamacharya's students, and it became widely known through B.K.S. Iyengar's Light on Yoga (1966) and the standing sequence of Ashtanga Vinyasa. Our overview of yoga styles in the Krishnamacharya lineage shows how those two schools branched out.
How to do Extended Side Angle Pose, step by step
- Stand in Tadasana (Mountain Pose). Step your feet wide apart, about the length of one of your legs, and raise your arms out to the sides at shoulder height.
- Turn your right foot out 90 degrees and your left foot in a little. Line up the right heel with the arch of the left foot. Heel to heel is the stricter form, and it is harder to balance.
- Breathe out and bend the right knee until the shin is vertical and the thigh moves toward parallel with the floor. The knee stays over the ankle and points toward the second and third toes. This is the leg position of Warrior II.
- Lengthen your torso to the right over the bent leg, then lower the right hand to a block or the floor on the outside of the right foot. Press the back of your right arm and the outer knee into each other.
- Bring the left arm up toward the ceiling, then turn the palm to face the floor and reach it over your left ear. The arm continues the line of the back leg.
- Press the outer edge of the back foot into the floor, keep the back knee straight, and turn your chest toward the ceiling. Look up at your top hand, or straight ahead if your neck complains.
- Stay for five breaths. To come out, press into both feet, breathe in and come up with the arms wide. Turn the feet and repeat on the left side.
In the Ashtanga standing sequence the pose comes right after the triangles, with five breaths on each side and the gaze on the top hand. Iyengar also teaches it straight after Trikonasana (Triangle Pose), so you move from a straight front leg to a bent one.
Benefits of Extended Side Angle Pose
The pose is a strength hold and a stretch at the same time. The front leg does most of the work, and the rest of the body lengthens around it.
- Legs and hips: the quadriceps and glutes of the front leg hold the bent knee, and the back leg works straight and strong.
- Side body: the top side stretches from the outer edge of the back foot through the waist, the ribs and the armpit to the fingertips.
- Inner thighs: the adductors of the front leg lengthen as the knee moves out over the foot and the hip opens.
- Stamina: five slow breaths with a bent knee heats the body up, which is why the pose sits early in many standing sequences.
Older texts, including the previous version of this post, claim the pose stimulates the abdominal organs. There is no evidence for that, and we have left it out.
Who should skip or modify it
- Knee problems: bend the front knee less and keep it pointing over the middle toes. If the knee hurts, shorten the stance.
- Neck problems: look straight ahead or down at the floor instead of up at the top hand.
- Shoulder problems: keep the top arm pointing to the ceiling, or rest the top hand on your hip.
- Groin or hip injury: use a shorter stance and a block, and do not push the knee back against the arm.
- High blood pressure or dizziness: keep the head in line with the spine and come up slowly.
- Pregnancy: a forearm on the thigh and a wider, shorter stance keep the belly free. Follow your midwife's or doctor's advice.
Our 10 tips to avoid yoga injuries apply to every standing pose.
Common mistakes
- Knee falling in. The front knee drifts toward the big toe. Move it out until it points over the second and third toes, with the arm to help.
- Knee past the ankle. The stance is too short. Step the back foot further away until the shin is vertical.
- Collapsing onto the leg. Weight sinks into the lower arm and the waist crunches. Lighten the hand, use a block, and lengthen both sides of the waist.
- Back foot lifting. The outer edge of the back foot comes off the floor. Press it down, or brace the heel against a wall.
- Top arm reaching forward. The arm points past your face and the chest turns down. Draw the arm back in line with the ear and roll the top shoulder open.
Preparatory poses
These work the same legs, hips and side body:
- Virabhadrasana II (Warrior II): the same bent front leg, with the torso upright.
- Utthita Trikonasana (Triangle Pose): the side stretch with a straight front leg.
- Anjaneyasana (Low Lunge): opens the front of the back hip.
- Prasarita Padottanasana (Wide-Legged Forward Bend): lengthens the hamstrings and inner thighs in a wide stance.
- Baddha Konasana (Bound Angle Pose): outward rotation and length in the inner thighs.
- Adho Mukha Svanasana (Downward-Facing Dog): calves, hamstrings and shoulders in one pose.
Follow-up poses
- Ardha Chandrasana (Half Moon Pose): from Extended Side Angle, shift the weight forward and lift the back leg.
- Vasisthasana (Side Plank): the same long line of the side body, on one arm.
- Malasana (Garland Pose): a deep squat that uses the hip opening.
- Bakasana (Crow Pose): the arm balance that often follows a standing sequence.
Variations
- Forearm on the thigh: rest the lower forearm on the front thigh instead of the hand on the floor. This is the version most beginners start with, and many classes call it Side Angle Pose.
- Hand on a block: keeps the length in the waist when the floor is too far away.
- Bound Side Angle (Baddha Parsvakonasana): the lower arm wraps under the front thigh, the top arm wraps behind the back, and the hands meet behind the back.
- Revolved Side Angle (Parivrtta Parsvakonasana): the twisted version, with the opposite elbow or hand outside the front knee. It comes right after this pose in the Ashtanga sequence, and Sofia Soori breaks it down in her Revolved Side Angle tutorial.
To practise the pose in its place in a sequence, take Sofia Soori's 45-minute Complete All the Standing Postures, an Ashtanga class at level 1-2 with no props.
Frequently asked questions
What are the benefits of Extended Side Angle Pose?
It strengthens the legs, above all the quadriceps and glutes of the bent front leg, and it stretches the side of the body from the back foot to the top hand. It also lengthens the inner thigh of the front leg. Claims that it massages or stimulates the abdominal organs are not supported by research.
What is the difference between Side Angle Pose and Extended Side Angle Pose?
Most teachers use Side Angle for the version with the lower forearm resting on the front thigh. In Extended Side Angle the lower hand goes down to a block or the floor beside the front foot, and the top arm reaches over the ear, so the side of the body stretches further.
How do you cue Extended Side Angle Pose?
Cue from the ground up: press the outer edge of the back foot down, bend the front knee over the ankle, press the arm and the knee into each other, turn the chest to the ceiling and reach the top arm over the ear. One line from the back heel to the top fingertips.
Should the hand go inside or outside the front foot?
Iyengar and most classical teachers place the hand outside the front foot, which helps press the knee out. The hand inside the foot is easier for many beginners and is common in Vinyasa classes. Both work if the knee stays over the middle toes.
How long should you hold Extended Side Angle Pose?
Five breaths on each side is the Ashtanga count and a good start. In Iyengar classes the pose is held longer, often 30 seconds to a minute. Come up if the front knee aches or the back foot starts to lift.
Is Extended Side Angle Pose good for beginners?
Yes, with the forearm on the thigh or the hand on a block. Beginners get the leg work and the side stretch without having to reach the floor, and can lower the hand as the hips and legs open.
Practise it with a teacher
Over 600 online yoga classes and programs for $4.99 a month. Cancel any time.
Become a member