Plank Pose (Phalakasana): How to Do It Step by Step

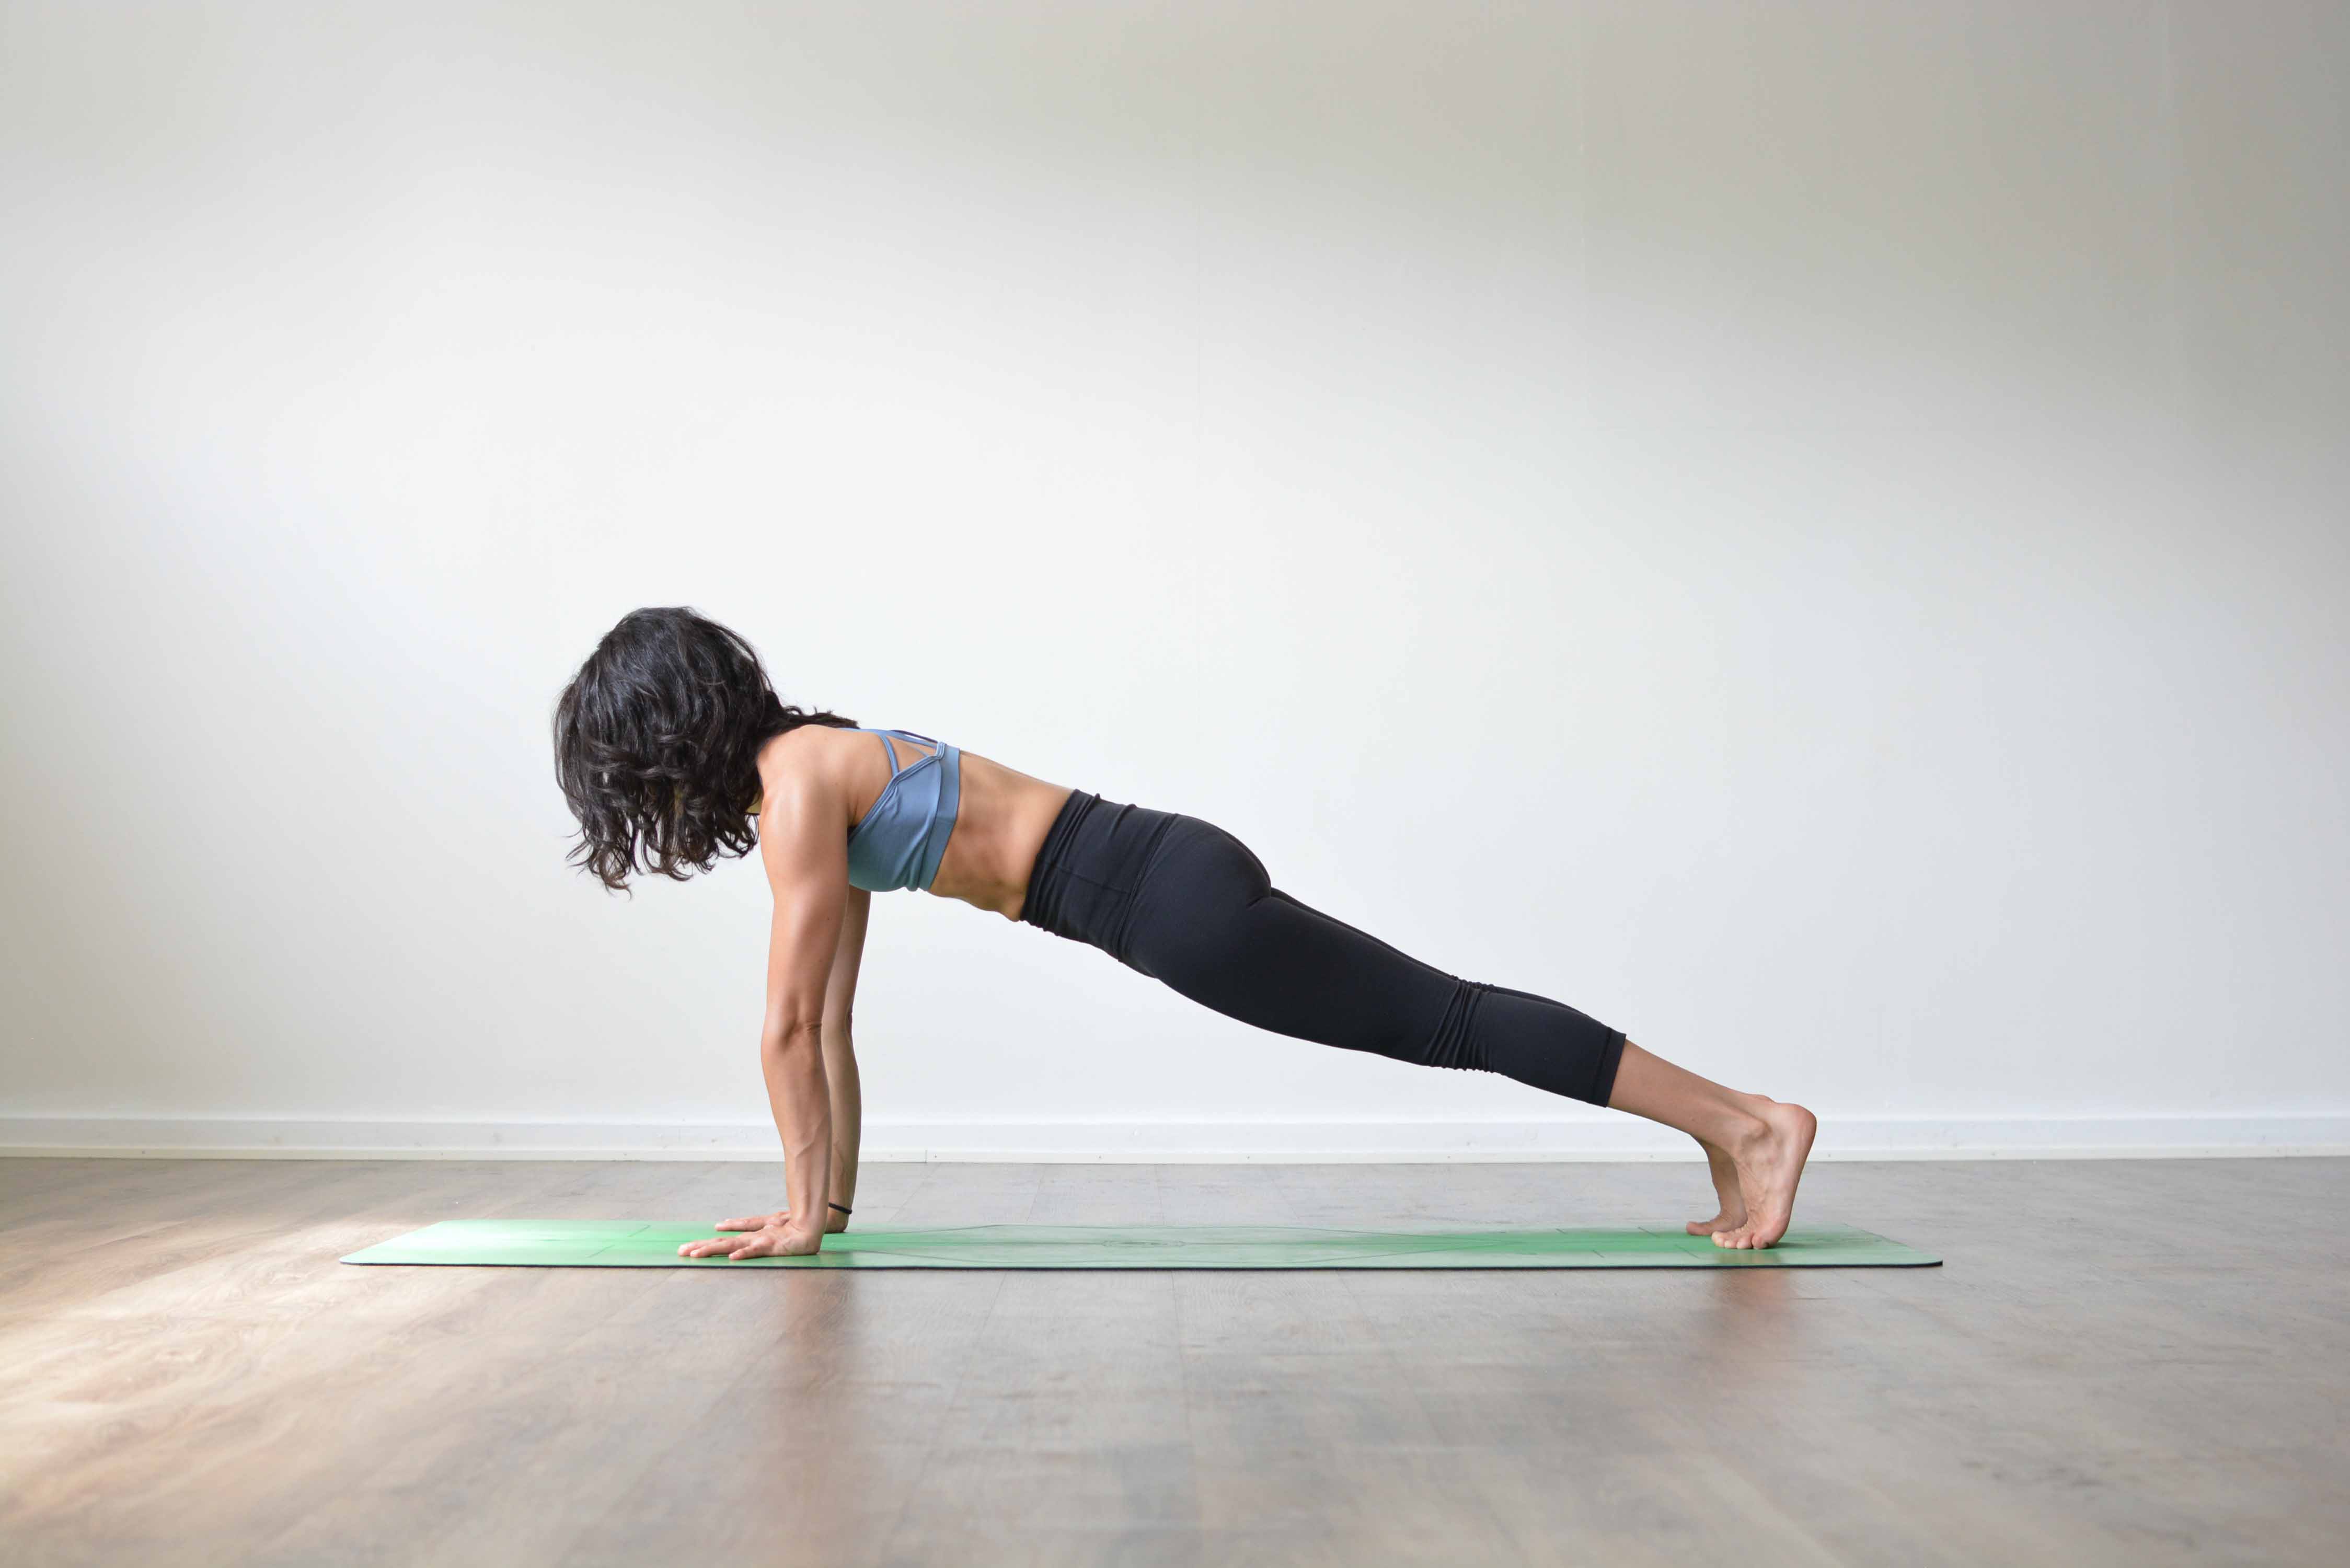
Plank Pose (Phalakasana) is a yoga pose in which you hold your body in one straight line from head to heels, supported on straight arms and the balls of the feet, with the shoulders stacked over the wrists. It strengthens the core, shoulders and arms without moving the spine. Beginners can do it with the knees on the floor, and in a Sun Salutation it is the step between Downward-Facing Dog and Chaturanga.
Pose type: arm support, core strength. Level: beginner with the knees down, beginner to intermediate in the full pose. Props: none needed. A folded mat or a wedge under the heels of the hands helps sore wrists.
What Plank Pose is called in Sanskrit
Plank has several Sanskrit names, and that tells you something about its age. Phalakasana is the most common: phalaka means plank or board, asana means seat or posture. Ashtanga and Iyengar teachers often say Utthita Chaturanga Dandasana, the extended Four-Limbed Staff Pose, because plank is Chaturanga with straight arms. The Bihar School calls it Santolanasana, the balancing pose. Some studios use Kumbhakasana, from kumbhaka, breath retention, although nobody should hold the breath in it.
None of these names appears in the old hatha texts. Plank is a modern pose. It spread in the 20th century through the Sun Salutations taught in Krishnamacharya's lineage, where it is the moment you pass through on the way down to the floor.
How to do Plank Pose, step by step
Try it standing first. Stand facing a wall, arms straight, palms on the wall at shoulder height. Push the wall away so your shoulder blades spread apart. That push is what holds you up on the floor.
- Come onto your hands and knees. Place your hands under your shoulders, fingers spread, middle fingers pointing forward. Knees go under the hips.
- Press the whole hand into the mat, with extra weight into the base of the index finger and thumb. This takes load off the outer wrist.
- Tuck your toes under and step your feet back one at a time until your legs are straight. Heels press back, as if you were standing on a wall behind you.
- Check your line from the side: head, shoulders, hips and heels in one diagonal. The hips sit level with the shoulders, not above them and not sagging below.
- Hug your lower ribs toward your hip bones. Firm the front of your thighs and squeeze the legs toward each other.
- Push the floor away. The space between your shoulder blades rises a little, and the shoulders move away from the ears.
- Look at the floor slightly in front of your hands so the back of the neck stays long.
- Breathe slowly through the nose. Start with three to five breaths. To come out, lower your knees and sit back into Balasana (Child's Pose).
You can also enter from Adho Mukha Svanasana (Downward-Facing Dog): inhale and shift forward until your shoulders are over your wrists. That is how most flow classes arrive in plank.
In the video, Lizette Pompa goes through plank piece by piece: shoulders, legs, pelvis and core. The same tutorial is on the class page Plank Tutorial.
Which muscles Plank Pose works
Gravity pulls your belly toward the floor. The muscles on the front of the body stop it.
- Abdominals: the rectus abdominis, the obliques and the deep transversus abdominis hold the spine still so the lower back does not sag.
- Serratus anterior: the muscle along the side of the ribs that spreads the shoulder blades. When it switches off, the chest sinks between the shoulders.
- Shoulders and arms: the front of the shoulders and the triceps hold the arms straight under part of your body weight.
- Legs and glutes: the quadriceps keep the knees straight and the glutes keep the hips from dropping.
If your shoulders work, your belly works and your breathing gets a bit quicker, you are doing it right.
Benefits of Plank Pose
Plank builds strength that holds still. The trunk muscles learn to keep the spine steady while the arms and legs carry load, and that is the skill behind Chaturanga Dandasana, arm balances and handstands.
- Core endurance: exercise research on the plank, often called the front bridge, shows the abdominals working hard while the load on the lumbar spine stays low. That is why physiotherapists use it.
- Shoulder stability: bearing weight on straight arms trains the muscles that hold the shoulder blade against the ribs.
- Wrists and forearms: they get used to carrying weight, gradually, which you need for the rest of a vinyasa practice.
What plank does not do is burn belly fat. Training one area does not remove fat from that area, and a small 2011 study found that six weeks of abdominal exercises alone did not reduce belly fat. For back pain the picture is mixed. Core exercises help some people with long-term lower back pain, but reviews find them about as useful as other forms of regular exercise. Read more in our post on core and yoga.
Who should skip or modify Plank Pose
- Wrist pain or carpal tunnel syndrome: plank bends the wrist back close to 90 degrees under load. Use the forearm plank, or make fists, or put a folded mat under the heels of the hands.
- Shoulder injury: start with the knees down and hold for a few breaths. Stop if you feel pinching at the front of the shoulder.
- High blood pressure: any long, hard hold raises blood pressure, and holding the breath raises it more. Keep the holds short, keep breathing, and ask your doctor if your blood pressure is not under control.
- Pregnancy and after birth: if your belly domes along the midline in plank, go to the knees or to an incline with your hands on a wall or a bench. A pelvic floor physiotherapist can tell you when the full pose is safe after birth.
- Lower back pain in the pose: it usually means the hips are sagging. Lower the knees and build the hold from there.
More on this in our 10 tips to avoid yoga injuries.
Where teachers disagree
Two cues are taught in opposite ways, and both have a point.
Tuck the tailbone, or keep a neutral spine? Many yoga teachers cue a slight tuck of the tailbone. It tilts the pelvis back a little, which switches on the abdominals and stops the lower back from arching. Physiotherapists and most strength coaches prefer a neutral spine, with the small natural curve in the lower back kept. Our view: if your back sags, a small tuck helps. If you already round, stay neutral. A hard tuck that curls the lower back is too much.
How long to hold? Fitness challenges count minutes. Spine researcher Stuart McGill recommends short holds of around ten seconds, repeated, because form breaks down when the muscles tire. In a yoga class, plank is usually three to five breaths, or one breath in a flow. Hold until your line starts to change, then rest. The quality of the plank matters more than the clock.
Common mistakes
- Sagging hips. The lower back takes the load. Lower the knees or shorten the hold.
- Hips too high. Then it becomes a half Downward-Facing Dog and the core does less. Lower the hips until they line up with the shoulders.
- Sinking between the shoulders. The shoulder blades pinch together and the chest drops. Push the floor away.
- Hands too far forward. The shoulders sit behind the wrists and the arms work harder than they need to. Stack shoulders over wrists.
- Weight in the heel of the hand. The outer wrist aches. Press down through the fingers and the base of the index finger.
- Holding the breath. Breathe in and out through the nose. If you cannot, the hold is too long.
- Dropping the head. Keep the neck in line with the spine.
Plank Pose variations

- Knees-down plank: the same line from head to knees, with the knees behind the hips. The best way to start, and a good way to keep practising the shoulder work when you are tired.
- Forearm plank (Dolphin Plank): elbows under the shoulders, forearms parallel, palms down. The wrists rest and the core works harder, because the body is lower and longer.
- Side Plank: roll onto the outer edge of one foot and lift the top arm. The obliques and the side of the hip take over. The steps are in our guide to Vasisthasana (Side Plank Pose).
- One-legged plank: lift one foot a few centimetres and keep the hips level. The hips want to twist, so the obliques work.
- Low plank (Chaturanga Dandasana): bend the elbows until the upper arms are about parallel to the floor, elbows close to the ribs. Stop before the shoulders dip below the elbows.

Wrist pain in plank
Sore wrists are common for people who practise a lot of vinyasa or Ashtanga, because every Sun Salutation puts weight on the hands. Warm them up before you start and build strength over weeks. Until they feel better, use the forearm plank, the side forearm plank or the knees-down plank.
Lauren Matters' ten-minute class Wrist Watch is a warm-up for strength and flexibility in the wrists. It fits before any practice.
Preparatory poses
- Cat and Cow: hands and knees under you, and the spine learns to move before it learns to stay still.
- Downward-Facing Dog: weight on the hands and the shoulders pushing the floor away.
- Knees-down plank: the full shoulder and core work with less load.
- Salabhasana (Locust Pose): strengthens the back of the body, which helps keep the hips from sagging.
Lizette Pompa's 20-minute beginner class Move into Plank builds the pose from the core up.
Follow-up poses
- Chaturanga Dandasana (Four-Limbed Staff Pose): lower from plank with the elbows close to the ribs.
- Urdhva Mukha Svanasana (Upward-Facing Dog): the backbend that follows Chaturanga in a Sun Salutation.
- Vasisthasana (Side Plank): turn from plank onto one hand.
- Bakasana (Crow Pose): the first arm balance most people learn, built on the same shoulder work.
To see where plank sits in a sequence, follow our Sun Salutation B step by step, or try one of our Vinyasa Flow classes, where plank comes up in every round.
Daniel Scott's 20 Minute Plank is twenty minutes of plank and static holds for the core and arms, level 1-2, no props.
Frequently asked questions
What is Plank Pose good for?
Plank strengthens the abdominals, the muscles around the shoulder blades, the arms and the legs, all while the spine stays still. That makes it a base for Chaturanga, arm balances and handstands. It also gets the wrists used to carrying weight.
How do you do Plank Pose correctly?
Place your hands under your shoulders and step your feet back until your body is one straight line from head to heels. Press the floor away, firm the belly and the thighs, keep the neck long and breathe through the nose. If the hips sag or rise, lower your knees.
How long should a beginner hold a plank?
Start with three to five breaths, around 10-20 seconds, and repeat two or three times with a short rest. Stop when your hips start to sag or you have to hold your breath. Several short holds in good form do more than one long hold in poor form.
Do planks flatten your belly?
No, not on their own. Planks strengthen the abdominal muscles, but you cannot burn fat from one spot by training the muscle under it. Belly fat changes with overall diet, activity and sleep. A stronger core can make you stand and sit taller, though.
What is Plank Pose called in Sanskrit?
The most common name is Phalakasana, from phalaka, plank or board. You will also hear Utthita Chaturanga Dandasana (extended Four-Limbed Staff Pose), Santolanasana (balancing pose) and Kumbhakasana. Plank is a modern pose, so the name depends on the school.
Is Plank Pose bad for your wrists?
Plank is fine for healthy wrists when the weight spreads across the whole hand and you build up gradually. It can hurt if you put the weight in the heel of the hand or practise many Sun Salutations without warming up. With sore wrists, use the forearm plank or make fists.
What is the difference between Plank and Chaturanga?
In Plank your arms are straight. In Chaturanga Dandasana you bend the elbows and lower the body until the upper arms are about parallel to the floor, elbows close to the ribs. Plank is the easier pose and the preparation for Chaturanga.
Practise it with a teacher
Over 600 online yoga classes and programs for $4.99 a month. Cancel any time.
Become a member