Adho Mukha Vrksasana (Handstand): How to Do It Step by Step

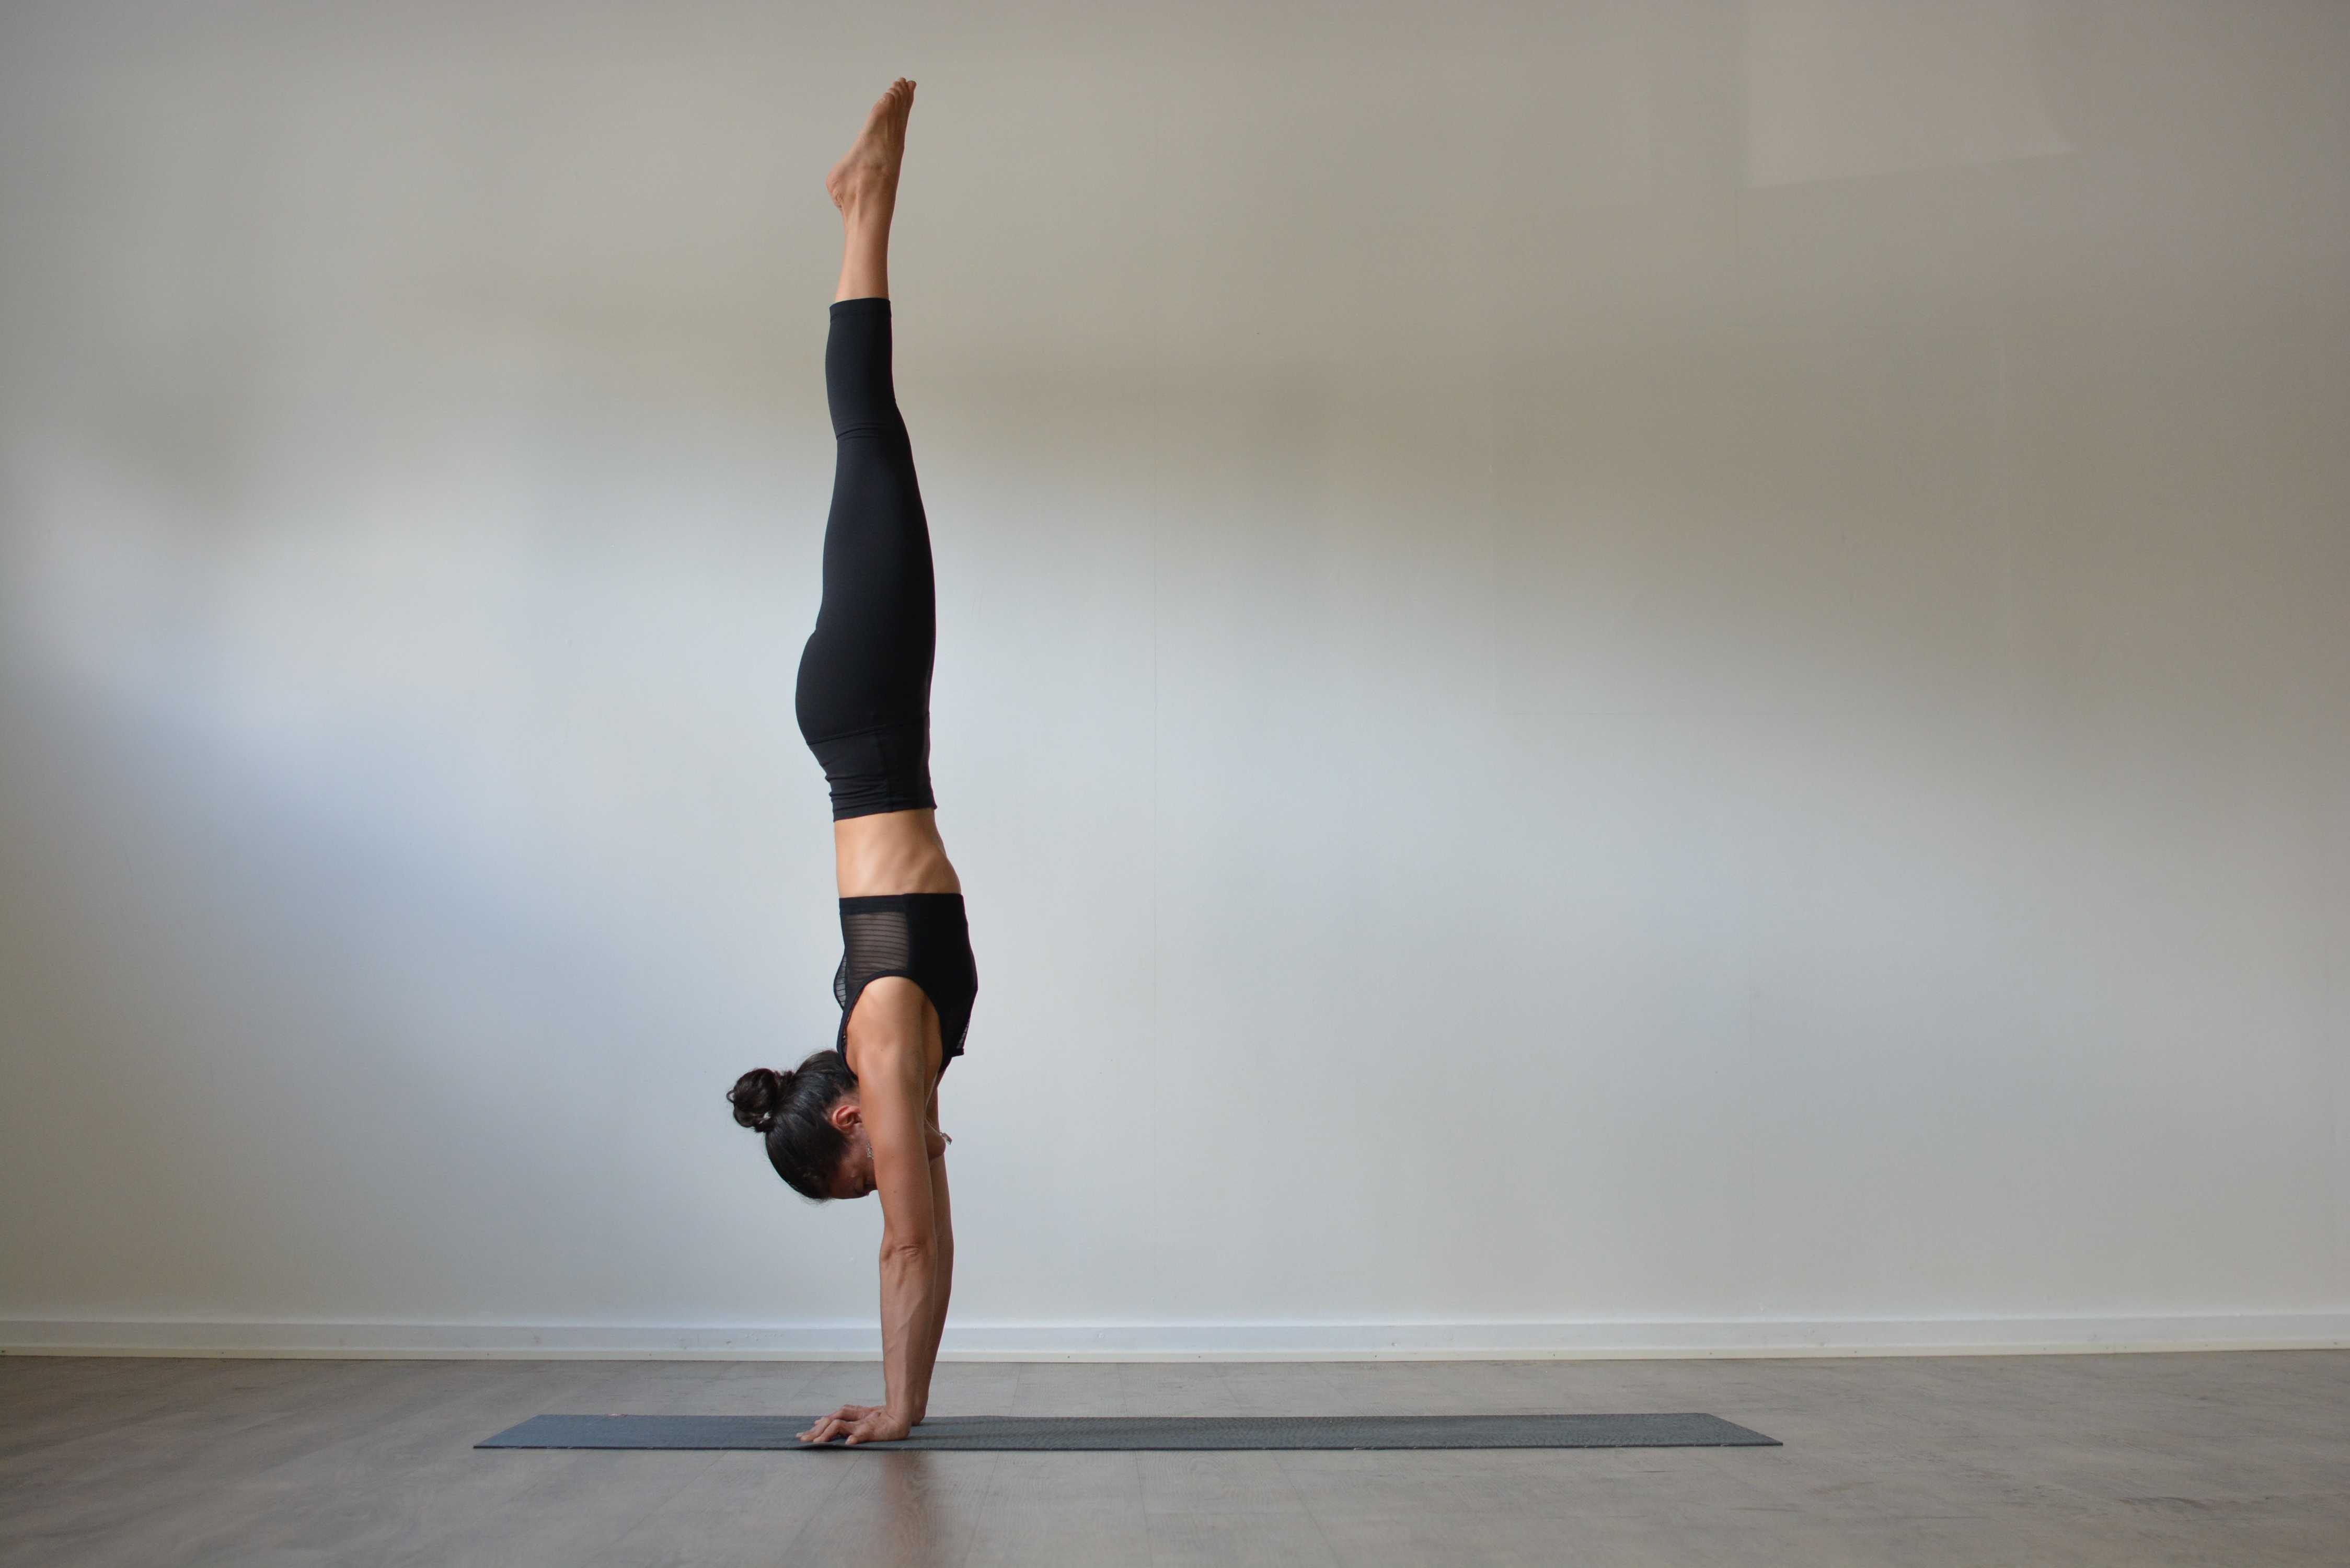
Adho Mukha Vrksasana (Handstand) is an inversion in which you balance upside down on your hands, arms straight, with your body in one long line above your shoulders. The name means downward-facing tree. Most people learn it against a wall first and spend months, sometimes years, on the free-standing balance.
Pose type: arm balance, inversion. Level: advanced. Props: a wall, and a mat that does not slide.
What Adho Mukha Vrksasana means
The name has four parts in Sanskrit: adho, downward, mukha, face, vrksa, tree, and asana, posture. Picture Vrksasana (Tree Pose) turned upside down: the hands are the roots and the legs grow up toward the ceiling. The same adho mukha shows up in Adho Mukha Svanasana (Downward-Facing Dog), the pose you start the handstand from.
The handstand is younger in yoga than many people assume. The Hatha Yoga Pradipika does not describe it. It became part of modern practice through the Krishnamacharya lineage in the 20th century, and B.K.S. Iyengar's Light on Yoga (1966) made the name Adho Mukha Vrksasana widely known. Handstands are much older in gymnastics and acrobatics, and yoga borrowed from that world as much as it gave to it.
How to do Handstand, step by step (at the wall)
Warm up your wrists and shoulders first. A few rounds of Sun Salutation, some Plank Pose and wrist circles are enough.
- Come into Downward-Facing Dog with your back to the wall. Place your hands shoulder-width apart, about a hand's length from the wall, fingers spread and index fingers pointing forward.
- Press the whole palm into the floor, most of all the base of the index finger and thumb. Straighten your arms and lift your shoulders toward your ears. That lift is what keeps the shoulders stacked over the wrists when you are upside down.
- Walk your feet in toward your hands until your hips are close to above your shoulders. Your hamstrings decide how far. Bend the knees if they need it.
- Lift one leg straight up. Bend the knee of the standing leg.
- Push off the floor with the bent leg and swing the lifted leg up toward the wall. Aim for a light, controlled hop, not a big kick. The standing leg follows.
- Let your heels rest on the wall. Draw your lower ribs in, squeeze your legs together and reach up through the inner heels. Keep your arms straight and your gaze on the floor between your hands.
- Breathe. Start with 5 slow breaths and build toward 30-60 seconds over weeks.
- Come down one leg at a time, with control, and rest in Balasana (Child's Pose) for a few breaths. Next round, kick up with the other leg.
Change which leg kicks. Almost everyone has a strong side, and training only that side makes the gap bigger.
Moving away from the wall
Once you can hold 30 seconds at the wall, take one heel off the wall and then the other, for a breath or two. Balance lives in the hands: when you tip toward your back, press the fingertips down; when you tip toward your face, press the heels of the hands. Learn a safe exit before you try it in open space. Turn one hand out, step it forward a little and let the body cartwheel down to the side, or roll out with the chin tucked if you have been taught how.
Benefits of Handstand
Handstand is a strength pose first. You hold your whole body weight on straight arms with the arms overhead.
- Shoulders and arms: it strengthens the shoulders, the triceps and the muscles around the shoulder blades, in full overhead range.
- Wrists and forearms: the wrists work in deep extension under load, and the forearm muscles make the constant small corrections that keep you up.
- Trunk: the abdominals and the muscles along the spine hold the line between shoulders and feet.
- Balance and body awareness: you learn to feel where you are in space with your eyes looking at the floor.
Many people feel alert and focused after a round of handstands. That comes from hard work and full attention. Claims that turning upside down "reverses blood flow" to renew the organs, or that handstands treat depression, have no study behind them. For more on why strength matters in a yoga practice, read why yogis need strength training.
Who should skip or modify Handstand
- Wrist problems: skip or practise on fists, parallettes or a wedge that reduces the bend, and talk to a physiotherapist if you have ongoing wrist pain.
- Shoulder injuries: a torn rotator cuff, dislocation history or pain when you lift the arms overhead means no handstand until the shoulder is cleared.
- High blood pressure, glaucoma and detached retina: head-down positions raise pressure in the head and eyes. Skip full inversions unless your doctor has said they are fine.
- Pregnancy: do not start learning handstand while pregnant. Someone with a long, steady practice should talk to their midwife or doctor.
- Neck problems: the neck is not loaded in handstand the way it is in headstand, but a fall is. Practise with a wall or a spotter.
Our 10 tips to avoid yoga injuries apply here as much as anywhere.
Common mistakes
- Bent elbows. Bent arms tire in seconds. Lock the elbows straight and let the bones carry the weight.
- Hands too far from the wall. The body ends up in a deep arch with the belly hanging toward the wall. Move the hands closer.
- Kicking with a straight standing leg and a big swing. Momentum sends you into the wall with a bang. Bend the standing leg and hop.
- Sinking into the shoulders. Push the floor away and reach up out of the shoulders.
- Looking forward too far. Craning the head to look at the wall arches the back. Keep the gaze between or slightly in front of the hands.
- Holding the breath. A held breath makes the whole body rigid and the balance jerky.
Preparatory poses
- Adho Mukha Svanasana (Downward-Facing Dog): the hand position and the overhead shoulders, with less load.
- Plank Pose: straight arms, strong trunk, wrists under load.
- Chaturanga Dandasana: pushing strength in the arms and chest.
- Bakasana (Crow Pose): your first balance on the hands, and the same trick of shifting weight into the fingers.
- Sirsasana (Headstand): being upside down, with a bigger base.
- Half handstand at the wall: from Downward-Facing Dog, walk your feet up the wall until your body makes an L, hips over shoulders. It builds the strength and the stacking without the kick.
Our post on core and yoga explains the trunk work that keeps the line straight.
Follow-up poses
- Balasana (Child's Pose): rest the wrists and let the heart rate settle.
- Wrist stretches: kneel, place the backs of the hands on the floor with fingers toward the knees, and breathe for a few rounds.
- Urdhva Mukha Svanasana (Upward-Facing Dog) or a gentle backbend to open the front of the body after the effort.
Handstand variations
- L-shape at the wall: feet on the wall, hips over shoulders. The best drill for most people starting out.
- Chest-to-wall handstand: walk the feet up the wall facing it, hands close to the wall. It teaches a straight line, and many teachers prefer it for that reason.
- Pincha Mayurasana (Forearm Stand): the same idea on the forearms, with more demand on shoulder mobility and less on the wrists.
- Straddle and tuck shapes: legs wide or knees bent, with the centre of gravity lower and easier to control.
- Press to handstand: lifting into the pose with no jump. Years of strength work for most people.
Where teachers disagree
Back to the wall or chest to the wall. Kicking up with the back to the wall is how most yoga classes start, and it teaches the kick. Gymnastics coaches prefer chest-to-wall, because it trains the straight line and a safe exit. Both work. Many people use the first to get the feeling and the second to fix the shape.
A slight arch or a straight line. Older yoga photos often show a gentle banana shape. Gymnastics teaches a hollow, straight body with the ribs drawn in. The straight line is easier to balance and easier on the lower back, so it is what we teach here. A small arch is not a fault on the way there.
Sofia Soori's favourite handstand drills give you four exercises for core and balance with blocks, a chair and a wall, and Lizette Pompa's kick-up tutorial shows how to use the bottom leg to come up.
Frequently asked questions
What is Adho Mukha Vrksasana?
Adho Mukha Vrksasana is the Sanskrit name for Handstand, an advanced yoga inversion where you balance on your hands with straight arms and the body stacked above the shoulders. The name means downward-facing tree, because the pose looks like Tree Pose turned upside down.
What is the Sanskrit word for handstand?
Handstand is Adho Mukha Vrksasana in Sanskrit: adho means downward, mukha face, vrksa tree and asana posture. You may also see it spelled Adho Mukha Vriksasana. Forearm stand is a different pose, called Pincha Mayurasana.
What does adho mukha mean?
Adho mukha means face down or facing downward. It appears in several pose names, such as Adho Mukha Svanasana (Downward-Facing Dog) and Adho Mukha Vrksasana (Handstand). Adho Mukha Virasana is a different pose again: Hero Pose folded forward, close to Child's Pose.
How long does it take to learn a handstand?
Kicking up to a wall and holding 30 seconds takes many people a few months of regular practice. A steady free-standing handstand usually takes much longer, often a year or more of short, frequent sessions. Strength in the shoulders and trunk and regular practice matter more than age.
Is handstand safe for beginners?
Handstand is an advanced pose. A beginner can start on the parts: Plank, Downward-Facing Dog and an L-shape with the feet on a wall. Learn to come down safely before you kick up, practise at a wall or with a spotter, and skip it if you have wrist, shoulder or blood pressure problems.
Should I face the wall or have my back to the wall?
Back to the wall is easier to get up into and teaches the kick. Chest to the wall is harder to get into but trains a straight body and an easy exit. Many teachers use both: back to the wall to learn to kick up, chest to the wall to work on the shape.