Virabhadrasana II (Warrior II): How to Do It Step by Step

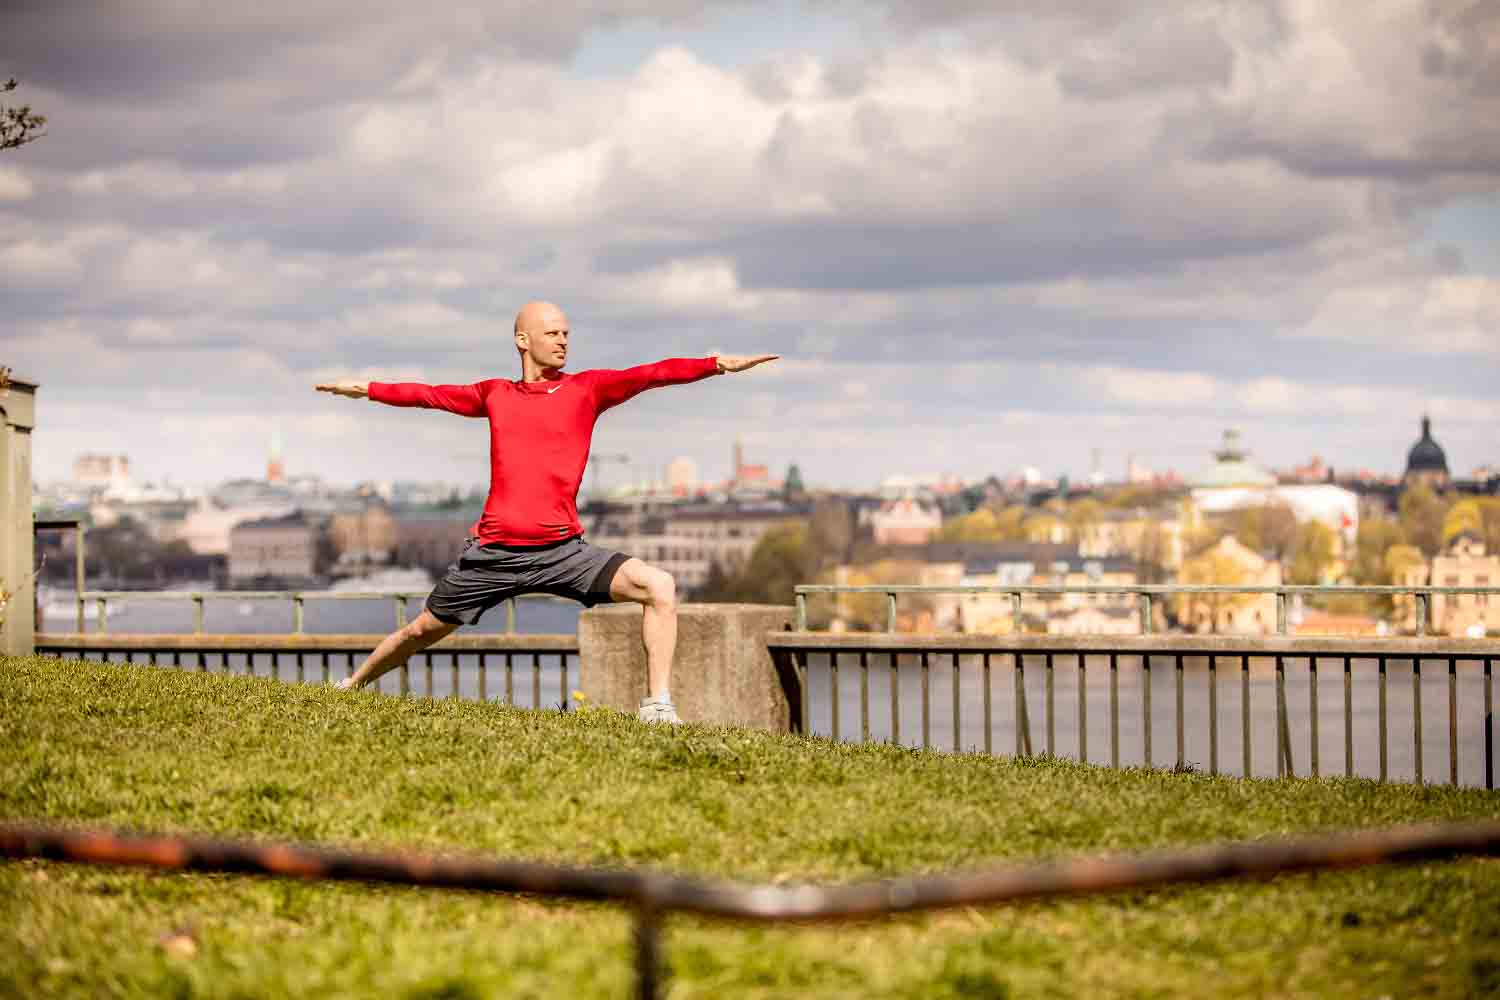
Virabhadrasana II (Warrior II) is a standing yoga pose with the legs wide apart, the front knee bent over the ankle, the back leg straight and the arms stretched out at shoulder height, gaze over the front hand. It works the front thigh and the hips and opens the inner thigh of the back leg. The pose comes down to three things: the feet, the hips and the chest.
Pose type: standing, hip opener, leg strength. Level: beginner, level 1. Props: none, a wall or a chair if you need support.
What Virabhadrasana means
Virabhadra is a fierce warrior from Hindu mythology, and asana means seat or posture. In the story, Shiva tears out a lock of his hair in grief and rage after the death of his wife Sati, and Virabhadra rises from it to go after her father, Daksha. The three warrior poses are sometimes told as three moments of that attack.
The story is old. The poses are not. Warrior II does not appear in the Hatha Yoga Pradipika or the other medieval hatha texts. It shows up in the 20th century, in the teaching that came out of Krishnamacharya's school in Mysore, and B.K.S. Iyengar's Light on Yoga (1966) made it one of the best known standing poses in the world. In Ashtanga it is called Virabhadrasana B. You can read more about that family tree in the yoga styles of the Krishnamacharya lineage.
Lizette Pompa breaks the pose down in this short tutorial:
How to do Warrior II, step by step
These steps use the right leg in front. Work in three parts, from the ground up: feet, hips, chest.
- Stand in Tadasana (Mountain Pose) facing the long side of the mat. Step your feet wide apart, about the length of one leg. With your arms out to the sides, your ankles should land roughly under your wrists.
- The feet. Turn your right foot out 90 degrees so the toes point to the short end of the mat. Turn the left foot in a little. Line up the heels, or place the right heel in line with the arch of the left foot. The second option is wider and steadier, and most beginners like it better.
- Press into the outer edge of the back foot and the big toe mound of the front foot. Lift the arches.
- The hips. Breathe out and bend the right knee. Let the right thigh turn out from the hip, so the knee points toward the middle toes and stays over the heel. As the thigh turns out, the pelvis follows it and the left hip moves a little forward. Let it. That is how the pelvis should move.
- Bend deeper until the right shin is vertical. The thigh moves toward parallel with the floor. Stop earlier if the knee starts to drift inward.
- The chest. Keep the legs where they are and turn your chest back toward the long side of the mat, so both shoulders face the side. The turn happens in the upper back, above the pelvis.
- Lengthen the tailbone toward the floor and stack the shoulders over the hips. The body stays upright, weight evenly between both legs.
- Stretch the arms out to the sides at shoulder height, palms down. Let the shoulders drop away from the ears.
- Turn your head and look past the right middle finger. Breathe slowly through the nose for 5 breaths, or 30 seconds to a minute.
- To come out, breathe in, press into the front foot and straighten the right leg. Turn the feet parallel, then do the other side.
Should the hips face the side of the mat?
A lot of classes teach that both hips should open all the way to the side, and that the back hip has to roll back until the pelvis faces the long edge of the mat. Try it and watch the front knee. For most bodies, forcing the pelvis to the side turns the front thigh inward, and the knee falls in toward the big toe.
Put the attention on the front leg instead. Turn the front thigh out from the hip, keep the knee over the heel and let the back hip come forward as far as it needs to. Then open the chest to the side with the upper back. The pelvis ends up a little angled toward the front of the mat, and the knee is safe. Iyengar teachers cue a pelvis that faces the side more fully. With open hips, that works. With tight hips, it pushes the strain down into the knee.
Benefits of Warrior II
Warrior II is strength work for the legs. You hold a bent knee against body weight, and the longer you stay, the more you feel it.
- Front leg: the quadriceps and the glutes hold the bend, and the outer hip muscles keep the knee from falling in.
- Back leg: a stretch along the inner thigh and groin, plus work in the outer foot and ankle as you press down.
- Arms and shoulders: holding the arms at shoulder height builds endurance in the shoulders and upper back. Five slow breaths is enough to feel it.
Practising the pose regularly helps you stand steady on a wide base, and it teaches knee alignment you will use in many other standing poses. Claims that it improves circulation or digestion come from studio tradition, not from studies. For more on strength around the hip joint, see our hip-strengthening yoga exercises.
Who should skip or modify Warrior II
- Knee pain: bend the front knee less and shorten the stance. Come out if you feel pain inside the knee.
- Hip pain or a hip replacement: keep the stance shorter and the bend smaller, and ask your physiotherapist how far the hip may turn out.
- Shoulder or neck problems: put your hands on your hips instead of stretching the arms, and look straight ahead instead of over the hand.
- Poor balance: stand with the back heel against a wall, or rest the front thigh on the seat of a chair.
- Pregnancy: the pose is often kept in prenatal classes. Use a wider, shorter stance and shorter holds, and follow your midwife's advice.
Our 10 tips to avoid yoga injuries go through the general rules.
Common mistakes
- The front knee falls inward. Turn the front thigh out and aim the knee at the middle toes. This is the most common mistake, and it strains the inside of the knee.
- Forcing the hips square to the side. Let the back hip come forward and open the chest instead.
- Leaning over the front leg. The chest drifts forward and takes the back shoulder with it. Stack the shoulders over the hips.
- A stance that is too short. The knee ends up well past the ankle. Step the feet wider until the shin can stand vertical.
- The back foot collapses. The outer edge of the back foot lifts and the arch drops. Press the outer edge down.
- Shoulders up by the ears. Soften them down, and let the arms reach long from the shoulder blades.
Preparatory poses
- Tadasana (Mountain Pose): the standing base and the upright spine.
- Baddha Konasana (Bound Angle Pose): outward rotation in the hips and the inner thighs.
- Anjaneyasana (Low Lunge): the bent front knee over the ankle, with the back knee down.
- Prasarita Padottanasana (Wide-Legged Forward Bend): the wide stance and the inner thighs.
Follow-up poses
Warrior II is a hub in most standing sequences. From here you can move to:
- Viparita Virabhadrasana (Reverse Warrior): keep the legs, reach the front arm up and back.
- Utthita Parsvakonasana (Extended Side Angle Pose): same legs, forearm to the thigh or hand to the floor.
- Trikonasana (Triangle Pose): straighten the front leg and reach forward and down.
- Ardha Chandrasana (Half Moon Pose): a balance on the front leg with the hips open.
Warrior II variations
- Hands on hips: takes the load off the shoulders and lets you feel the pelvis.
- Chair Warrior II: sit sideways on a chair with the front thigh on the seat and the back leg long.
- Shorter stance: less bend in the knee, less load on the legs. Good for a first class.
- Pulsing Warrior II: straighten and bend the front leg with the breath before you hold. A common warm-up in vinyasa flow.
Day 3 of our Vinyasa Fundamentals course works through Warrior II, High Lunge and Warrior I, with the placement of the hips and feet.
Frequently asked questions
What is Warrior 2 pose good for?
Warrior II strengthens the front thigh and the glutes, works the outer hip muscles that keep the knee in line, and stretches the inner thigh of the back leg. Holding the arms out builds endurance in the shoulders. It also teaches you to stand steady on a wide base, which you use in many other standing poses.
What is the difference between Warrior 1 and Warrior 2?
In Warrior I the hips and chest face the front of the mat, the back heel is often lifted or turned in more, and the arms reach overhead. In Warrior II the chest faces the side of the mat, the heels are in line and the arms stretch out at shoulder height over the legs.
Should the front knee go past the toes in Warrior 2?
Aim for the knee over the heel, with the shin vertical. If the knee goes far past the toes, the stance is usually too short, so step the feet wider. The direction matters more than the distance: the knee should point toward the middle toes, never fall inward.
Should my hips face the side in Warrior 2?
Not all the way, for most people. Turn the front thigh out, keep the knee over the heel, and let the back hip come a little forward. Then turn the chest to the side with the upper back. Forcing the pelvis square to the side often makes the front knee collapse inward.
How long should you hold Warrior 2?
Five slow breaths per side is a common hold in a flow class. In Hatha and Iyengar classes you may stay 30 seconds to a minute. Build up time as your legs get stronger, and come out if the knee hurts or the shoulders tense up.
Is Warrior 3 harder than Warrior 2?
Yes, for most people. Warrior III is a balance on one leg with the body tipped forward, and it asks for more strength in the standing leg, the back and the core. Warrior II keeps both feet on the ground and is a level 1 pose.
Practise it with a teacher
Over 600 online yoga classes and programs for $4.99 a month. Cancel any time.
Become a member